


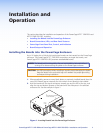

3. Carefully slide the board into the slot, aligning the two tabs on the lower front end of
the board with the matching ports in the enclosure. Push the board firmly into place.
Tighten the screws to secure the board in place.
NOTE: Use a tool to fully tighten the screws after initial installation and
subsequent removal and replacement of the boards..
4. Repeat steps 2 and 3 for all boards needing installation.
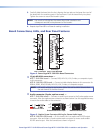
Board Connections, LEDs, and Rear Panel Features
PowerCage
MTP T 15HD RSA
PowerCage
MTP R 15HD RSA SEQ
OUTPUT
AUDIO RS-232
Tx
ADJUST
SELECT
R
G/L
B/P
Rx
INPUT
PowerCage
MTP R
15HD RSA SEQ
AUDIO INPUT
RS-232
Tx Rx
L R
OUTPUT
INPUT
PowerCage
MTP T
15HD RSA
PRE-PEAK
ON
OFF
2
3
5
6
4
1
3
1
7
9
8
4
2
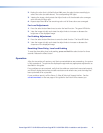
Figure 2. PowerCage MTP 15HD RSA Board Connectors
a
15-pin HD VGA connectors —
MTP T 15HD RSA board — Connect RGB, HD-YUV, YUV, S-video, or composite inputs
to this connector.
MTP R 15HD RSA SEQ board — Connect suitable display devices to this connector for
RGBHV, RGBS, RGsB, RsGsBs, HD-YUV, YUV, S-video, or composite output.
NOTE: DIP switch settings on the receiver allows the user to switch chroma from
the red channel to the blue channel.
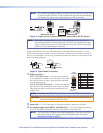
b
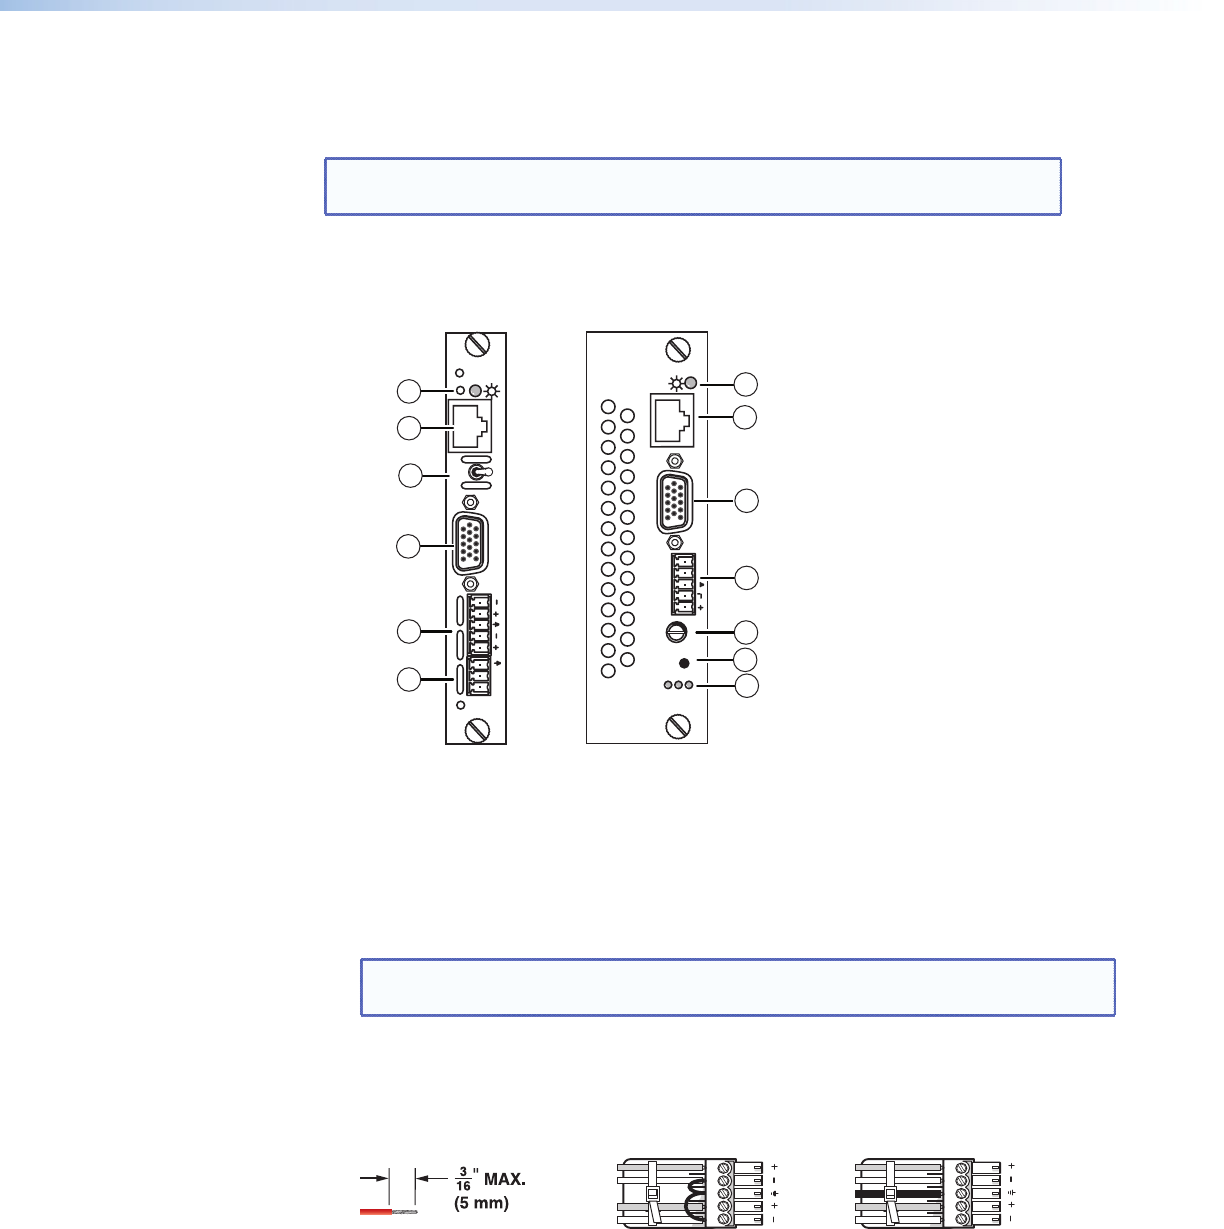
Audio connector (5-pole captive screw) —
MTP T 15HD RSA board — Connect an audio input source to the 5-pole captive screw
connector. Wire the captive screw connector as shown below. Use the supplied tie-wrap
to secure the audio cable to the connector.
L R
Unbalanced Stereo Input
Balanced Stereo Input
Ring
Sleeve (s)
Tip
Sleeve
Tip
Sleeve
Tip
Tip
Ring
Do not tin the wires!
Figure 3. Captive Screw Connector Wiring for Stereo Audio Input
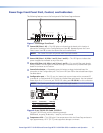
MTP R 15HD RSA SEQ board — On this board, this is an audio and RS-232 output
connector. Wire and insert a 5-pole captive screw connector for mono audio and/or
RS-232 serial output. Wire the connector as shown in figure 4.
PowerCage MTP T 15HD RSA and PowerCage MTP R 15HD RSA SEQ • Installation and Operation 5