


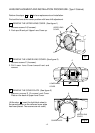

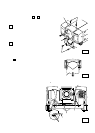
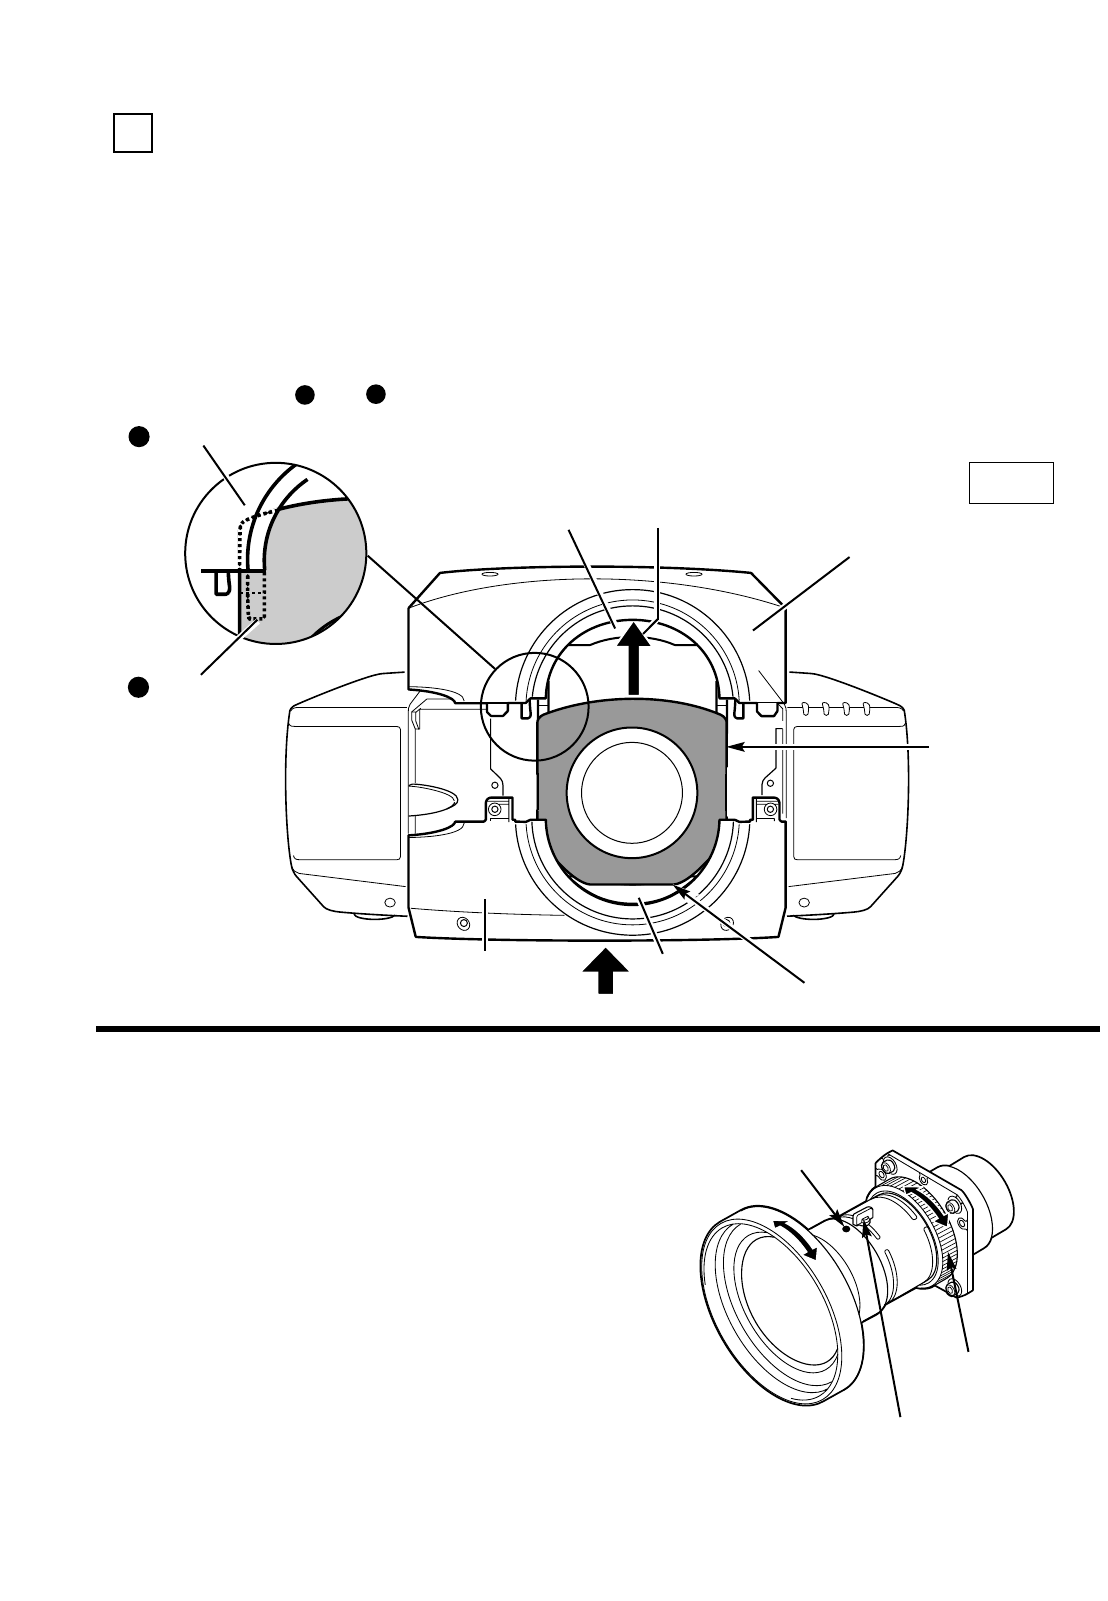
FOCUS ADJUSTMENT
Set up the projector and project image on the screen.
1. Loosen the Focus Lock Screw on the projection
lens.
2. Rotate the projection lens to obtain proper focus
on center area of the screen.
When the distance of the screen and lens is 1 meter,
set
mark (yellow) of the lens on Focus Lock Screw
position.
3. Lock the Focus Lock Screw securely.
When proper focus is not observed at outer area of
the screen, proceed following adjustments.
4. Loosen the Focus Lock Ring on the projection
lens. (Turn the Lock Ring to counter-clockwise.)
5. Rotate the lens to obtain proper focus on outer
area of the screen.
6. Lock the Focus Lock Ring securely. (Turn the Lock
Ring to clockwise.)
If proper focus is not observed entire screen, repeat
above adjustment 1~ 6.
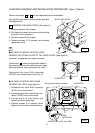
Focus Lock Screw
Focus Lock Ring
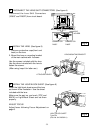
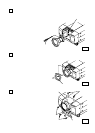
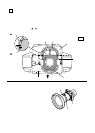
LOWER LENS
COVER
UPPER LENS
COVER
LIGHT-BLOCK
SHEET
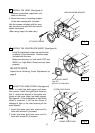
FLAP
Slide into front
of the flap.
Slide into front
of the flap.
FLAP
Slide upper both side of LIGHT BLOCK
Sheet into between and
.
2
1
CABINET
GUIDE
1
2
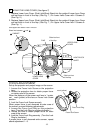
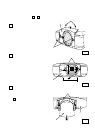
MOUNT THE LENS COVER. (See figure-7)
7
1. Replace Lower Lens Cover. Slide Light-Block Sheet into the guide of Lower Lens Cover
and set them in front of the flap. (See Fig. 7.) Fix Lower Lens Cover with 4 Screws C.
(See Fig. 2.)
2. Replace Upper Lens Cover. Slide Light-Block Sheet into the guide of Upper Lens Cover
and set them in front of the flap. (See Fig. 7.) Fix Upper Lens Cover with 2 Screws A.
(See Fig. 1.)
Fig-7
mark (yellow)
-6-