14
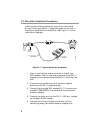
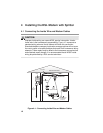
2. Inside the residence, locate the telephone RJ-11 wall
jack that is nearest to your PC and remove it. Replace it
with a new dual RJ-11 wall p late a nd connect the s ame
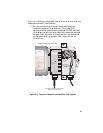
colored wires that are attached to the g reen and red
screws on the DSL splitter data m odule to the g reen
and red pins on the RJ-11 wall jack. For example, if a
black w ire is connected to the green screw in the data
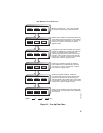
side of the DSL splitter (s ee Figure 4-2 ), connect the
same black wire to the green pin of the new wall jack.
(If required, repeat this step for the voice wire.)
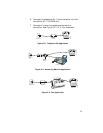
3. Connect the new RJ-11 c able, part num ber
FC9660CB26, b y inserting the RJ -11 connector into the
RJ-11 data jack on the wall plate and the other end to
the LINE connector on the back of the DSL modem.
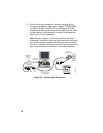
4. Connect your telephone set to the other telephone RJ -
11 voice jack on the wall plate.
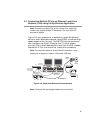
5. For an Ethernet connection, c onnect one end of the
Ethernet (crossover) cable, pa rt number FC9660CB23,
to the DATA connector on the back of the D SL modem
and connect the other end of the Ethernet cable to the
network i nterface c ard in the computer.
Note: The term “straight,” when used to describe the cable
assemblies, is defined to mean that the transmit and receive pin-
outs remain the same entering and exiting the cable assembly.
The term “crossover” means that the transmit and receive pin-out
pair will be reversed or crossed over in the cable assembly.


