83
- Restoring Your System Image and Software
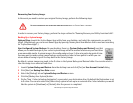
Running Recovery and Utility from the Bootable disc
To verify/change the boot-up priority (rather than booting-up from the hard drive or an external floppy disk drive),
perform the following steps:
1 Power on your system. When the Fujitsu logo appears on the screen. press the [F12] key.
2 Highlight the CD/DVD option from the Boot menu, then press [Enter].
3 Insert the bootable disc into the drive tray.
4 Click [OK].
5 Select CD/DVD boot mode: UEFI Mode) and press [Enter]. While the files are being loaded from the disc, the
Fujitsu logo screen will appear followed by a progress bar screen at the bottom of the screen.
Recovery and Utility tools
Diagnostics tool: The Diagnostics tool is designed for use by IT professionals. It is not likely you will need to use this
tool. If you should need to use this tool, perform the following steps:
1 Press the “Diagnostics Tool” button to start the Diagnostics tool. A progress bar appears while the Diagnostics tool
is starting up.
2 Read the note, then click [OK].
3 Choose one or more of the following options for diagnostics on the “Fujitsu Hardware Diagnostics Tool window”:
CPU, Memory, Display, Hard Disk, CD/DVD/BD, Floppy Disk, Keyboard, and Mouse. Click the [Option] button to
specify how many times the tool should run diagnostics on each selected component. Press [Execute] to start the
Diagnostics tool.
4 After the execution is completed, the selected components are circled in red to indicated that they have been
diagnosed and the result dialog window is opened.
5 Click [End] to close the Diagnostics tool, then click [Yes] to confirm the end of diagnostics session.
Recovery tool: The Recovery tool contains three options. User System Backups: Recovering C: Drive from D: Drive or
external storage device), Restore C: Drive: Restore factory image (only C: drive), and Restore Full Hard Drive:
Restore factory image (full hard drive).You can use these tools to restore the Factory Image from the hidden


