


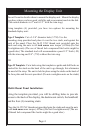
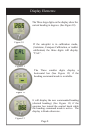


Mounting the Display Unit
Page 4
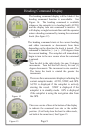
You will want to decide where to mount the display unit. Mount the display
in a place where you have good visibility and a convenient reach to the dial.
(The outside diameter is 4” and 4-1/2” with the trim ring.)
Using template (A) provided, you have two options for mounting the
Standard display unit:
Type I Template: Cut a 3-3/4” diameter hole (3.750). Use the
mounting strap provided and place it over the two studs, and against the
back of the panel. Place the #6-32 UNC thread nuts provided onto the
studs and snug the nuts to 60 inch ounce max torque (.42Nm).(Do Not
Overtighten nuts) (The use of thread lock compound like loctite might be
a good idea.) The standard stud will accommodate a panel 1/2” thick (.50)
with the trim ring and 3/4” (.750) without the trim ring.
OR
Type II Template: Cut a hole using the template as guide and drill holes as
marked for the studs on the back of the unit to go through, this eliminates
the need of the strap. The unit is held in place using the studs on the back of
the face plate and the nuts provided. (Do not overtighten nuts on the studs)
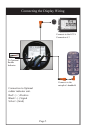
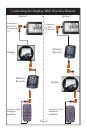
Multi-Mount Panel Installation:
Using the template provided, you will be drilling holes to provide
access to the back of the display, the deckmount switch, the handheld
and the four (4) mounting studs.
Place the #6-32 UNC thread nuts provided onto the studs and snug the nuts
to 60 inch ounce max torque (.42Nm).(Do Not Overtighten nuts) (The use
of thread lock compound like loctite might be a good idea.)