Adjusting monitor settings www.gateway.com
14
On-screen display options
Adjusting OSD settings
To adjust the OSD settings:
Tips & Tricks
While the OSD is active, on-screen labels
appear next to the buttons to help you
identify them.
1 Press the Auto button. The display image is automatically adjusted to the
ideal settings for your current screen resolution.
2 Press the Menu button. The OSD menu opens.
3 Press the (up) and Theme (down) buttons to highlight a setting, then
press the Auto button to open the selected menu or setting.
4 Press the (up) and Theme (down) buttons to adjust the setting to the
desired level or change the option.
5 Press the Input button to return to a previous menu.
6 When you have finished making all adjustments, press the Menu button
at the Main Menu to exit.
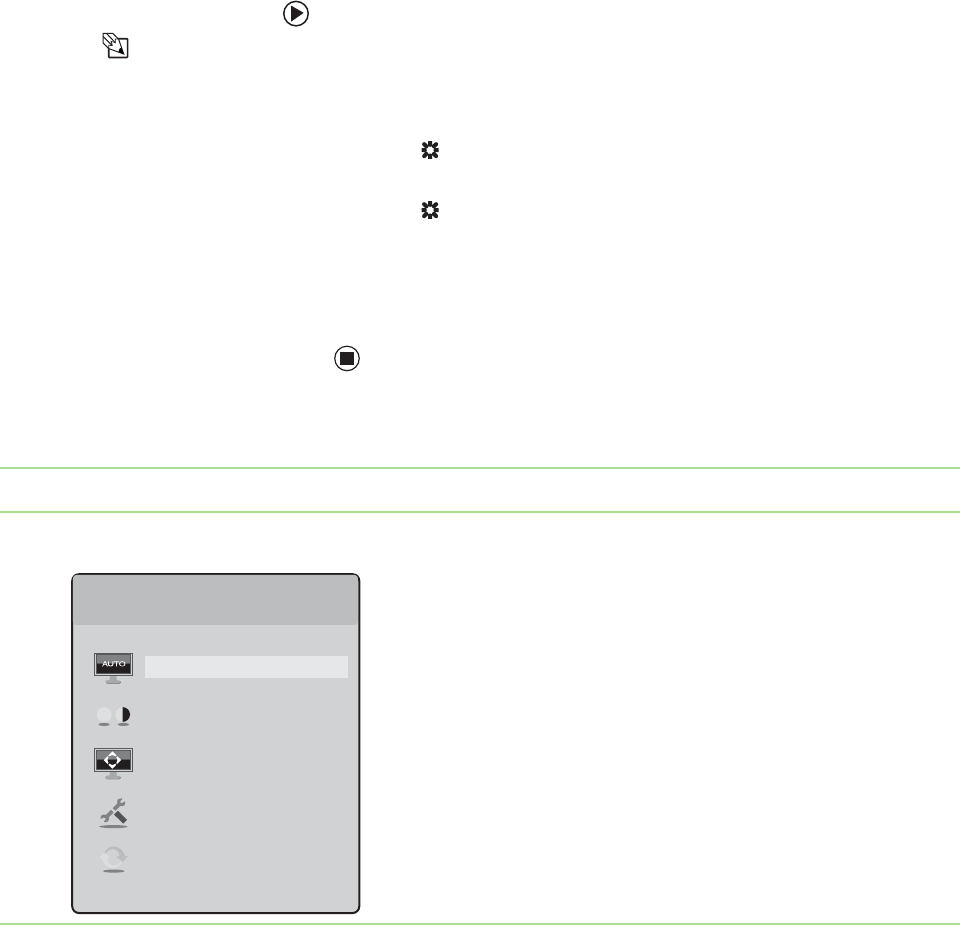
OSD menus
OSD Menu Description
Main menu
Auto—Automatically adjusts your monitor to its optimum
settings.
Picture—Opens the Picture menu, where you can adjust
brightness, contrast, and gamma.
Geometry—Opens the Geometry menu, where you can
adjust image size and minimize distortions.
Advanced—Opens the Advanced menu, where you can
adjust color balance, change the OSD language, and display
information about current monitor settings.
Reset—Resets the monitor to its factory settings.
Main Menu
Auto
Picture
Geometry
Advanced
Reset
8511654.book Page 14 Monday, July 24, 2006 11:00 AM


