3
Section 2 - Installing RAM into the Elite 12 Series Printer
1. Switch off the printer.
2. Unplug the interface cables from the back of
the printer. Do not unplug the power cord from
the AC outlet.
3. If necessary, move the printer so that you have
clear access to its left side.
4. Remove the paper tray.
5. Open the top cover by pressing the release
button on the top right of the printer.
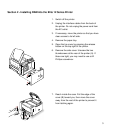
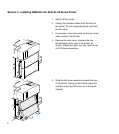
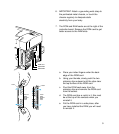
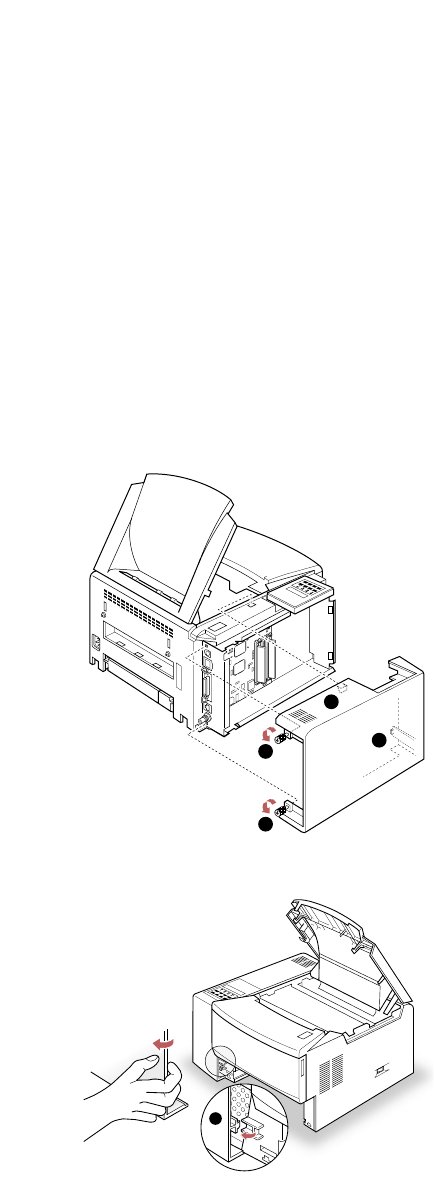
6. Remove the side cover. Unscrew the two
thumbscrews at the rear of the printer (A). If
these are tight, you may need to use a #2
Phillips screwdriver.
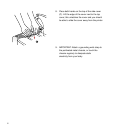
7. Reach inside the case. Pull the edge of the
cover (B) toward you, then move the cover
away from the rest of the printer to prevent it
from latching again.
A
A
C
B
B


