


14
Installation Instructions
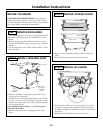
STEP 14
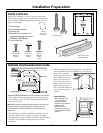
SECURE DISHWASHER
TO CABINET AND
COUNTERTOP
To maintain position and alignment, the dishwasher
must be secured to the countertop and adjacent
cabinets.
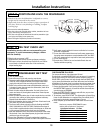
Secure dishwasher to countertop:
• Drill pilot holes through the mounting bracket and
into the underside of the countertop. Secure with
screws A provided.
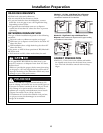
IMPORTANT: To avoid damage to your dishwasher,
drive screws straight and flush. Protruding screw heads
may scratch the top of the escutcheon or door and can
interfere with door closing.
Secure dishwasher to adjacent cabinets:
• Remove plastic plugs button on the inside of the
dishwasher frame. One on each side.
• Drill pilot holes through the dishwasher holes and
into the adjacent cabinets. Install screws B provided.
• Replace plastic plug buttons.
Screw B
Screw A
Plug Buttons
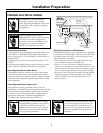
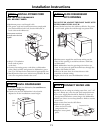
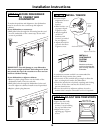
STEP 15 INSTALL TOEKICK
• Loosen depth
adjustment screws
inside the
bracket.
• Slide bracket out
to proper depth.
Tighten screws.
• Attach supplied
toekick to
brackets with
screws C provided.
Do not tighten.
• Adjust the toekick
to touch the floor.
Tighten screws.
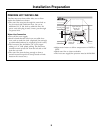
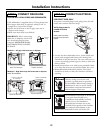
A continuous custom toekick is recommended for
models with long custom door panels.
• Cut a notch in the toekick deep enough to allow the
door to swing freely under the dishwasher.
• Check for interference by slowly opening and closing
the door. If the door touches the toekick, trim to
prevent interference.
• Secure the toekick to adjacent cabinets in such a
manner that it may be removed if service is required.
Attachment Screws
Adjust to
Toekick
Depth
Adjust to Touch Floor
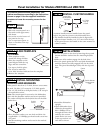
INSTALL A
CONTINUOUS
CUSTOM
TOEKICK
Notch the continuous
toekick to allow the door
panel to swing under the
dishwasher.
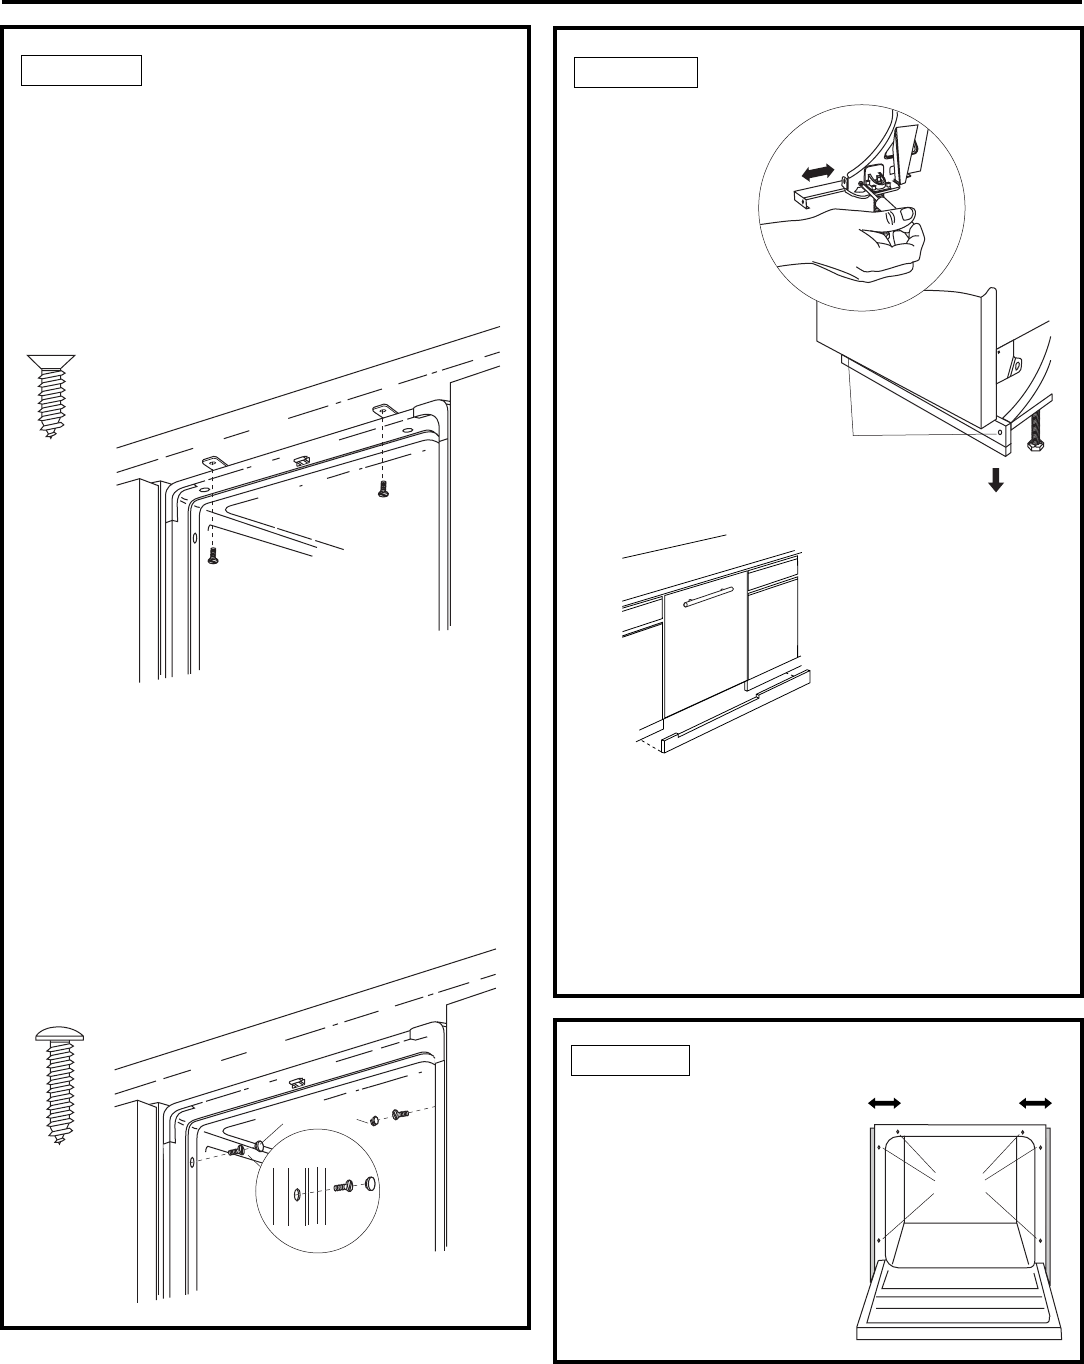
STEP 16 ADJUST SIDE TRIM STRIPS
• Open the door fully.
• Loosen (but do not
remove) screws holding
the top and side trims.
• Adjust trim to cover
opening gap. Tighten
screws.
Loosen
Screws
Adjust Side Trim
to Meet Cabinetry