


Safety Information
• IMPORTANT – The dishwasher MUST
be installed to allow for future removal from the
enclosure if service is required.
If you received a damaged dishwasher, you should
immediately contact your dealer or builder.
READ CAREFULLY.
KEEP THESE INSTRUCTIONS.
FOR YOUR SAFETY
Read and observe all CAUTION and WARNINGS
shown throughout these instructions.
For Monogram local service in your area,
1-800-444-1845.
For Monogram service in Canada
1-888-880-3030
For Monogram Parts and Accessories, call
1-800-626-2002.
2
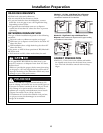
BEFORE YOU BEGIN
Read these instructions completely and carefully.
• IMPORTANT - Save these instructions for
local inspector’s use. Observe all governing
codes and ordinances.
• Note to Installer - Be sure to leave these instruc-
tions with the Consumer.
• Note to Consumer - Keep these instructions with
your Owner’s Manual for future reference.
• Skill Level – Installation of this dishwasher requires
basic mechanical and electrical skills. Proper installa-
tion is the responsibility of the installer. Product
failure due to improper installation is not covered
under the GE Appliance Warranty.
• Completion Time – 1 to 2 Hours. New installa-
tions require more time than replacement installa-
tions.
CONTENTS
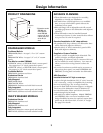
Design Information
Product Dimensions .......................................................3
Models Available ............................................................ 3
Advance Planning.......................................................... 3
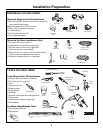
Installation Preparation
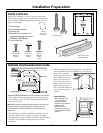
Materials You Will Need .................................................4
Tools You Will Need .......................................................4
Parts Supplied .................................................................5
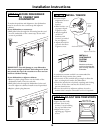
Prepare Dishwasher Enclosure ..................................... 5
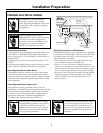
Drain Requirements .......................................................6
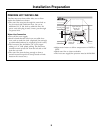
Prepare Electrical Wiring...............................................7
Prepare Hot Water Line.................................................8
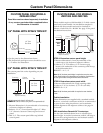
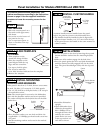
Custom Panel Dimensions
Custom Panels for ZBD6400 ......................................... 9
Custom Panels for ZBD7000, ZBD7005 ........................9
Installation Instructions
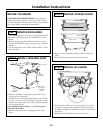
Step 1, Remove Packaging ...........................................10
Step 2, Install Leveling Legs ....................................... 10
Step 3, Remove Access Covers .................................... 10
Step 4, Install 90° Elbow...............................................10
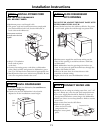
Step 5, Install Power Cord............................................11
Step 6, Level Dishwasher..............................................11
Step 7, Slide Dishwasher into Opening.......................11
Step 8, Connect Water Line ........................................ 11
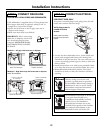
Step 9, Connect Drain Line ........................................ 12
Step 10, Connect Electrical......................................... 12
Step 11, Position and Level Dishwasher......................13
Step 12, Pre-Test Check List........................................ 13
Step 13, Dishwasher Wet Test ..................................... 13
Step 14, Secure Dishwasher
to Cabinet or Countertop ....................................... 14
Step 15, Install Toekick, Custom Toekick .................. 14
Step 16, Install Side Trim Strips ..................................14
Panel Installation for Models
ZBD7000 and ZBD7005............................................15