5
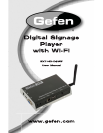
FRONT PANEL DESCRIPTIONS
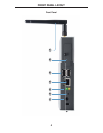
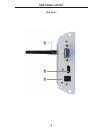
Front Panel
1 AV Out
Connect the included 3.5 mm mini-stereo to RCA cable to this output connector.
2 Reset
Press this button while performing a system reset. See page 51 for details.
3 LED Indicators
The Green LED indicates that the unit is powered. The Yellow LED indicates
data fl ow but is primarily used when performing a factory reset on the Digital
Signage Player (see page 51 for details).
4 Ethernet
Connect an Ethernet cable between the port and the network router or switch.
5 USB Ports
Connect a USB keyboard and fl ash drive to these ports to confi gure the Digital
Signage Media Player with Wi-Fi.
6 CF (Compact Flash) Slot
Remove the cover and insert a fl ash card to replace the 4 GB of internal
storage. The Digital Signage Player supports up to 16 GB of storage space.
7 Wi-Fi Antenna
The included Wi-Fi antenna must be connected to the Digital Signage Player in
order for the device to work properly. Make sure the Wi-Fi antenna is connected
before the unit is powered.


