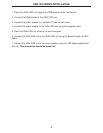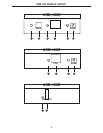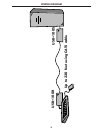
1. On the USB•100S send unit, check that the power in di ca tor is GREEN.
2. On the USB•100S send unit, check that the link indicator is GREEN.
3. On the USB•100R receiver unit, check that the power in di ca tor is GREEN.
4. Once all LEDs are illuminated as suggested, the USB•100 is ready to accept a USB
peripheral device at the USB port on the USB•100R receiver unit. Follow the installation
in struc tions as if one were installing the device directly into a com put er's USB port.
5. On the host computer, check that a general purpose hub is visible in the Control Panel.
Once con nect ed, a USB peripheral device causes its host computer to automatically
enumerate it. This simply means that the computer must identify the new device, assign
it an ID, and ensure that the required software drivers are available for loading when the
device is to be used.
6. The USB•100 is not an end device. Consequently, it does not have a software component
or driver to be loaded. Some peripheral devices that are to be at tached to the USB•100
will have a USB Driver diskette or CD-ROM which will need to be inserted after initial con-
nection to a USB port on the USB•100 model.
CHECK LIST
8


