


5 - 2 Quick Check® 600/800 Series User’s Guide
♦ To check the print buffer during operation:
1. Display the menu that begins with Print Results.
If scan results are displayed on the verifier, press SELECT.
If a menu (for example, a change setting menu) is displayed on the verifier,
press POWER repeatedly.
2. Press POWER.
3. Press ↑.
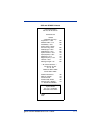
The on-demand print buffer display screen appears. The display provides
the percent of the memory used for the stored records and the number of
scan records in the memory. You can respond in one of three ways: a.)
Cont., b.) Prnt or c.) Cir. The cursor is at the asterisk next to Continue.
3.a To continue obtaining scan results, press SELECT. The opening
display appears. You can then scan a symbol.
3.b To print the stored records, press → to place the cursor on the
asterisk next to Print. Then press SELECT. The stored records
print. Once printed, the stored results are removed from the verifier’s
memory; however, the results from the last scan remain in the buffer.
(Press ← to display the last scan’s results.)
3.c To clear (delete) the records stored in the memory, press →
twice to place the cursor on the asterisk next to Clear and then press
SELECT. The stored results and the results from the last scan are
deleted from the verifier’s memory.
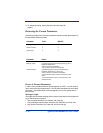
Printing Data
When a printer is attached to the verifier and turned on, you can print the current
scan results stored in the buffer. For this discussion, “current data” are data from
a scan that you just took and whose results are on the verifier’s display, or data
from a scan that you will perform momentarily. “Stored data” are scan records
stored or saved in the buffer. There are two ways to print current data — using
the AutoPrint/Store feature or through the Print Results menu. There are also
two methods to print stored data — through the Print Results menu or through
the Print Buffer menu.
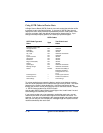
To print results, the Printer type (QCP or QCHSP) in the Printer Options menu
must match the type of printer you have connected to the verifier. If the
connected printer and the displayed printer abbreviation do not match, the
printout will be illegible.
♦ To print current data:
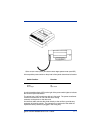
1. Connect the verifier and the printer and turn on both units. Be sure the
Printer type setting in the Output Options, Print Options menu matches the
type of printer to which the verifier is connected. Refer to "Changing the Out-
put Options" on page 3-12 for instructions.