


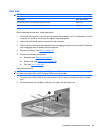
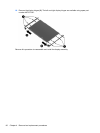
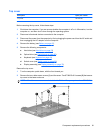

4. Open the computer as far as possible.
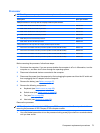
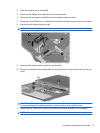
5. Disconnect the display panel cable (1) from the system board.
6. Disconnect the microphone cable (2) from the microphone extension cable.
7. Remove the Torx8 T8M2.5×4.0 screw (3) that secures the left display hinge cover to the computer.
8. Remove the left display hinge cover (4).
NOTE: The left and right hinge covers are available using spare part number 487144-001.
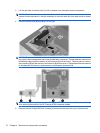
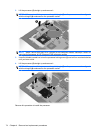
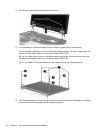
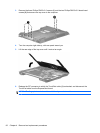
9. Disconnect the camera cable (1) from the system board.
10. Remove the wireless antenna cables (2) from the clips (3) and routing channel built into the top
cover.
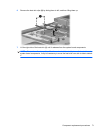
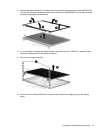
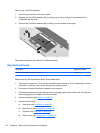
CAUTION: The display assembly will be unsupported when the following screws are removed.
To prevent damage to the display assembly, support it before removing the screws.
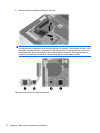
11. Remove the two T8M2.5×9.0 screws (1) that secure the display assembly to the computer.
NOTE: The screw on the left display assembly hinge secures a display panel cable ground loop.
Component replacement procedures 77