


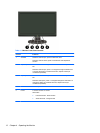

CAUTION: Burn-in image damage may occur on monitors that display the same static image on
screen for a prolonged period of time. To avoid burn-in image damage on your monitor screen, you
should always activate a screen saver application or turn off the monitor when it is not in use for a
prolonged period of time. Image retention is a condition that may occur on all LCD screens.
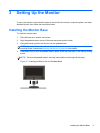
Mounting the Monitor
You can remove the monitor base to mount the monitor on a wall, a swing arm, or other mounting
fixture.
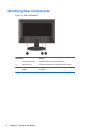
Four threaded mounting holes are provided on the monitor back panel to be used for mounting
purposes. These mounting holes are 75mm apart and are compliant with the Video Electronics
Standards Association (VESA) standard for mounting flat panel displays.
CAUTION: This monitor supports the VESA industry standard 75 mm mounting holes. To attach a
third-party mounting solution to the monitor, four 4 mm, 0.7 pitch, and 10 mm long screws are
required. Longer screws must not be used because they may damage the monitor. It is important to
verify that the manufacturer’s mounting solution is compliant with the VESA standard and is rated to
support the weight of the monitor display panel. For best performance, it is important to use the power
and video cables provided with the monitor.
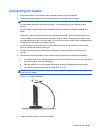
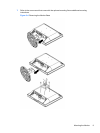
1. Disconnect and remove the signal and power cables from the back of the monitor.
2. Lay the monitor face down on a flat surface.
CAUTION: Do not remove the base from the monitor while the monitor is in the upright
position. Lay the front bezel down on a soft area to prevent it from getting scratched, defaced, or
broken. Ensure that the bottom of the monitor base is positioned over a table or desktop before
removing the base from the monitor.
3. Remove the pedestal base as shown in the following illustration.
4. Place the mounting fixture onto the back of the monitor. Line up the holes on the mounting
fixture with the holes in the back of the monitor.
5. Insert four screws into the holes and tighten.
6. Reconnect the cables.
8 Chapter 3 Setting Up the Monitor