


HP SureStore DAT
Installation Guide
1-14
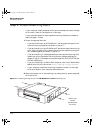
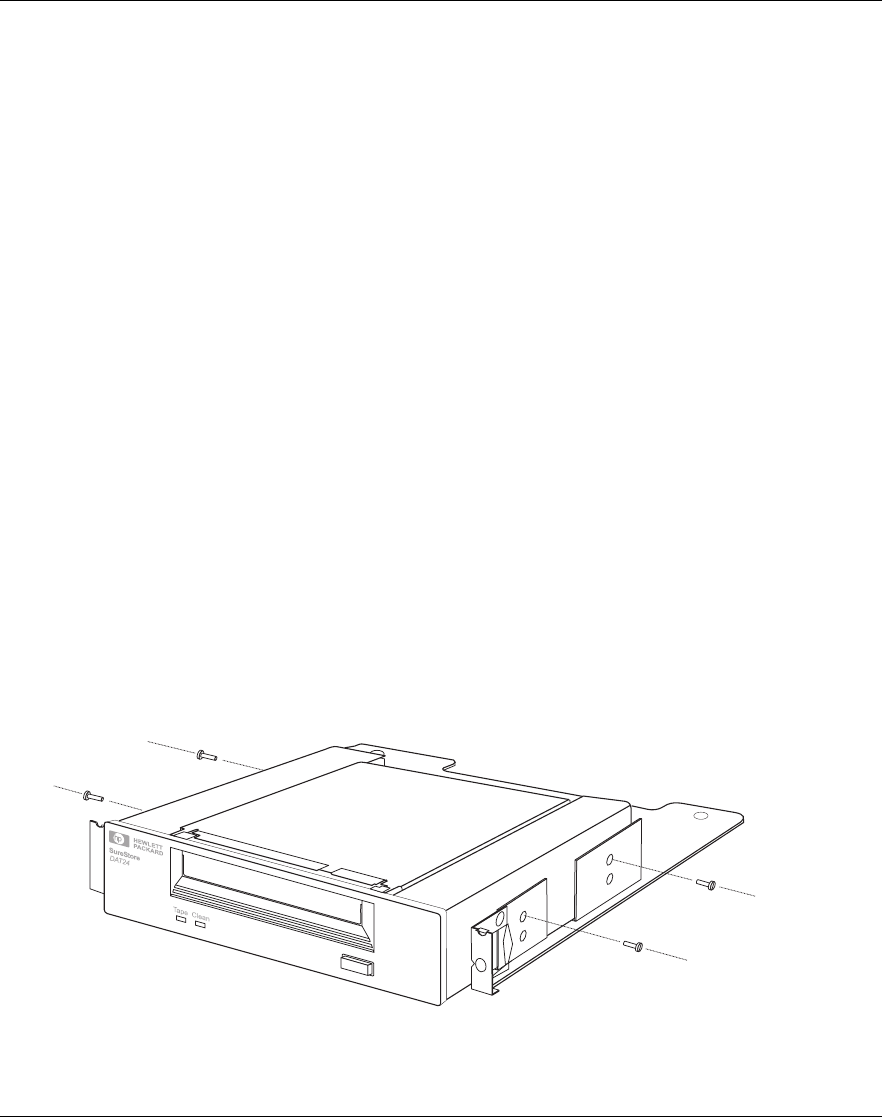
Step 4: Attach Mounting Rails
If your computer requires special rails or other hardware to install the tape
drive, mount them on the tape drive in this step.
If your computer does not require special mounting hardware, proceed to
step 5 on page 1-16 now.
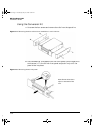
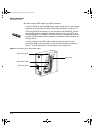
1 Attach the appropriate rails.
• If you are installing in an HP NetServer L-series, place the tape drive in
the mounting tray supplied, as shown in figure 1.7.
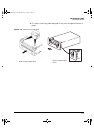
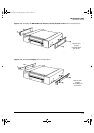
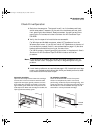
• If you are installing in an HP NetServer E-series that requires mounting
rails, Vectra, Kayak or Brio, fasten the rails to the tape drive using the
four screws supplied, as shown in figure 1.8.
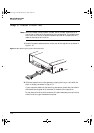
• If you are installing in a Compaq computer that requires mounting rails,
fasten the rails to the tape drive using the four screws supplied, as
shown in figure 1.9. Compaq rails are provided with DAT8i, DAT24i and
DAT40i models only.
• If you are installing in a IBM or Dell computer, refer to our World Wide
Web site for further instructions: http://www.hp.com/go/connect.
• If your computer uses other mounting hardware, attach it to the tape
drive as directed in your computer documentation.
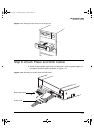
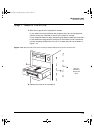
2 Secure the tape drive in the mounting tray using the four screws supplied
with the rail kit.
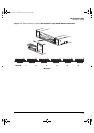
Figure 1.7 Attaching the tape drive to the HP NetServer L-series mounting tray
Use the four
screws
provided with
the rail kit
Dat-int.bk Page 14 Wednesday, May 26, 1999 10:46 AM