


11
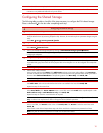
Configure the Virtual Disks on Node 1.
Power down Node 2. From the desktop of Node 1, select Start Æ Programs Æ Administrative Tools Æ
Computer Management. Then select Disk Management to create volumes out of the logical drives.
Note: Configure the virtual disks on one node at a time. Do not upgrade the logical drives from Basic to Dynamic.
Microsoft Cluster Services does not support dynamic disks.
Be sure to assign drive letters and format the volumes as NTFS partitions. It is a good practice to provide a volume label
to help identify the drives.
Close Disk Management.
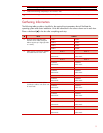
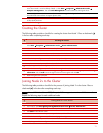
Creating the Cluster
The following table provides a checklist for creating the cluster from Node 1. Place a checkmark (3)
in the box after completing each step.
3
Creating the Cluster
From the desktop of Node1:
Select Start Æ Programs Æ Administrative Tools Æ Cluster Administrator.
Select Create New Cluster from the Action drop-down box. Click OK.
Click Next on the welcome screen.
Select the domain to create the cluster in and enter a name for the cluster. Click Next.
Enter the name of the first server to be in the cluster. Click Next.
When the cluster configuration wizard finishes analyzing the configuration, click Next.
Enter the IP address for the cluster. Click Next.
Enter the username and password for the cluster. Click Next.
Verify the proposed cluster configuration. Click Next.
When the cluster configuration wizard has finished creating the cluster, click Next and then click Finish.
Select Start Æ Control Panel Æ HP Management Agents. In the list of Inactive Agents, select Clustering
Information and click Add to move this agent to the list of active agents and click OK.
Restart the agents when prompted.
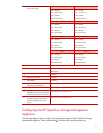
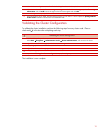
Joining Node 2+ to the Cluster
The following table provides a checklist for the process of joining Node 2+ to the cluster. Place a
checkmark (3) in the box after completing each step.
Note: Microsoft Windows Server 2003, Enterprise Edition supports a maximum of 8 cluster nodes.
Repeat the following steps for each additional node.
3
Joining Node 2+ to the Cluster
Power on Node 2.
From Node 2, select Start Æ Programs Æ Administrative Tools Æ Cluster Administrator.
Select Add nodes to cluster from the Action drop-down box. Enter the name of the cluster to join, click OK.
Click Next on the welcome screen.
Enter the name of the server that you want to join the cluster, click Add and the click Next.
When the cluster configuration wizard finishes analyzing the configuration, click Next.
Enter the user name and password for the cluster. Click Next.
Verify the proposed cluster configuration. Click Next.