


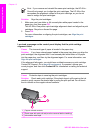
Reinsert the print cartridges and verify that they are fully inserted and locked in
place, and then try the alignment again. For more information, see Align the print
cartridges.
Cause The contacts on the print cartridge are not touching the contacts in the
print carriage.
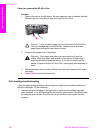
Solution Remove and then reinsert the print cartridges. Verify that they are
fully inserted and locked in place, and then try the alignment again. For more
information, see Align the print cartridges.
Cause You are not using HP print cartridges or you are using print cartridges
that have been refilled.
Solution The alignment process might fail if you are not using HP print
cartridges. It might also fail if you are using refilled print cartridges. Replace the
print cartridges with genuine HP print cartridges that have not been refilled, and
then try the alignment again. For more information on replacing the print
cartridges, see Replace the print cartridges. For more information on aligning the
print cartridges, see Align the print cartridges.
Cause The print cartridge or sensor is defective.
Solution Contact HP Support. Go to www.hp.com/support. If prompted,
choose your country/region, and then click Contact HP for information on calling
for technical support.
The HP All-in-One does not print
Solution If your HP All-in-One and computer are not communicating with each
other, try the following:
● Look at the control panel display on the HP All-in-One. If the control panel
display is blank and the light next to the On button is not lit, the HP All-in-
One is turned off. Make sure the power cable is firmly connected to the
HP All-in-One and plugged into a power outlet. Press the On button to turn
on the HP All-in-One.
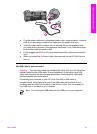
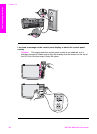
● Check the USB cable. If you are using an older cable, it might not be working
properly. Try connecting it to another product to see if the USB cable works.
If you experience problems, the USB cable might need to be replaced. Also
verify that the cable does not exceed 3 meters (9.8 feet) in length.
User Guide 95
Troubleshooting information