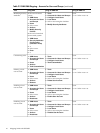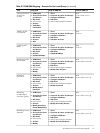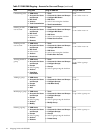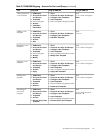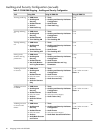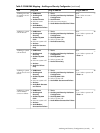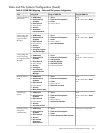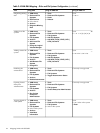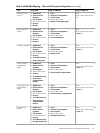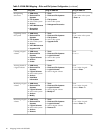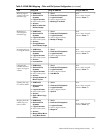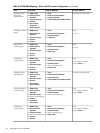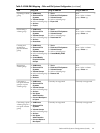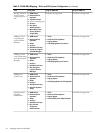
Table 2-4 SAM-SMH Mapping – Disks and File Systems Configuration (continued)
Using HP SMH TUIUsing HP SMH GUIUsing SAMTask
#smh
f > d > r
1. Tools
2. Disks and File Systems
3. Disks
4. Refresh
1. SAM Areas
2. Disks and File
Systems
3. Disk Devices
4. Select device
5. Actions
6. Diagnose Missing
Disk
Diagnosing missing
disk
#smh
f > f > h|v|c|n|I|a
1. Tools
2. Disks and File Systems
3. File Systems
4. Add File System
5. Add HFS | VxFS | CDFS | NFS |
CIFS | CacheFS
1. SAM Areas
2. Disks and File
Systems
3. File Systems
4. Actions
5. Add Local File
System
6. Using the Logical
Volume Manager
Adding local file
system
#smh
f > f > h|v | c|n | I|a
1. Tools
2. Disks and File Systems
3. File Systems
4. Add File System
5. Add HFS | VxFS | CDFS | NFS |
CIFS | CacheFS
1. SAM Areas
2. Disks and File
Systems
3. File Systems
4. Actions
5. Add Remote File
System
6. Using NFS
Adding remote file
system
Currently not supported
1. Tools
2. Disks and File Systems
3. File Systems
4. Toggle Automounter Status
1. SAM Areas
2. Disks and File
Systems
3. File Systems
4. Actions
5. Disable Automounter
Disabling the
automounter
Currently not supported
1. Tools
2. Disks and File Systems
3. File Systems
4. Veritas Enterprise Administrator
1. SAM Areas
2. Disks and File
Systems
3. File Systems
4. Actions
5. Run Veritas
Enterprise
Administrator
Opening Veritas
Enterprise
Administrator
#smh
f > f > Select a file system
> Enter
1. Tools
2. Disks and File Systems
3. File Systems
4. Select a file system
1. SAM Areas
2. Disks and File
Systems
3. File Systems
4. Select a file system
5. Actions
6. View More
Information
Viewing details of
a file system
24 Mapping SAM with HP SMH


