


128 Chapter4
field replaceable units
FRU removal and replacement
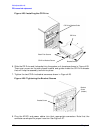
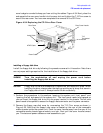
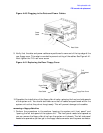
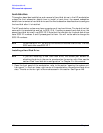
Figure 4-38. Installing the Floppy Disk Drive
6. Slide the floppy disk and its bracket into the system unit chassis as shown in Figure
4-38.
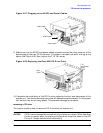
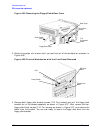
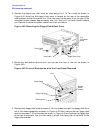
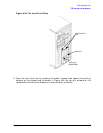
7. Tighten the two floppy bracket screws as shown in Figure 4-39.
Figure 4-39. Tightening the Bracket Screws
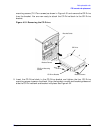
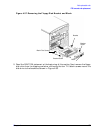
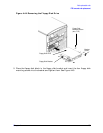
8. Plug the data and power cables into their appropriate connectors. Note that the
connectors are keyed for proper insertion. See Figure 4-40.
Floppy Disk
Drive Front
Panel
Bracket Screws
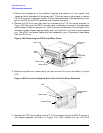
Floppy Disk Drive Bracket
Floppy Disk Drive Mounting
Screws (T-10 Torx Screws)
Bracket Screw
(hidden)
Bracket Screw