


Removal and Replacement Procedures
Maintenance and Service Guide 5–47
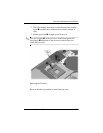
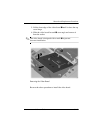
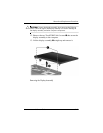
4. Close the computer and turn it upside down with the
rear panel toward you.
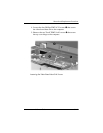
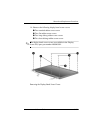
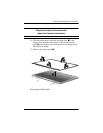
5. Remove the four Torx8 T8M2.5×9.0 screws 1 from the
computer bottom that secure the display assembly to
the computer.
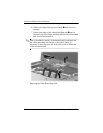
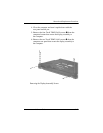
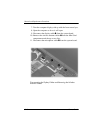
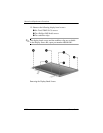
6. Remove the two Torx8 T8M2.5×9.0 screws 2 from the
computer rear panel that secure the display assembly to
the computer.
Removing the Display Assembly Screws