


e. Click the Apply button to save the settings.
12. Configure disks into the smart array from the remote graphics console.
All server blades have smart array cards, you must add the disk or disks to the smart array
before attempting to image the node.
To set up the smart array device, click the Remote Console tab on the virtual console page
of the iLO2 Web Administration Utility, and then do one of the following depending on the
browser type.
Internet Explorer
If you are using Internet Explorer as your browser, do the following:
a. Click the Integrated Remote Console link to open a remote console window which
provides access to the graphics console virtual media and power functions.
b. In the remote console window, click the Power button.
c. Click the Momentary Press button.
d. Wait a few seconds for the power up phase to begin. Click the MB1 mouse button in
the remote console window to put the pointer focus in this window so that your
keyboard strokes are recognized.
e. Proceed to step 13.
Mozilla Firefox
If you are using Mozilla Firefox as your browser, do the following:
a. Click the Remote Console link to open a virtual console window.
b. Go back to the iLO2 utility Web page and click the Virtual Devices tab.
c. Click the Momentary Press button.
d. Go back to the remote console window. Wait a few seconds for the power up phase to
begin. Click the MB1mouse buttonin this window to put the pointer focus in the remote
console window so that your keyboard strokes are recognized in this window.
e. Proceed to step 13.
13. Watch the screen carefully during the power-on self-test phase, and press the F8 key when
you are prompted to configure the disks into the smart array. Select View Logical Drives
to determine if a logical drives exists. If a logical drive is not present, create one.
If you create a logical drive, exit the SmartArray utility and power off the node. Do not let
it try to boot up.
Specific smart array configuration instructions are outside the scope of this HowTo. See the
documentation that came with your model of HP ProLiant server for more information.
14. Perform this step for HP ProLiant BL685c nodes; proceed to the next step for all other
hardware models.
On an HP ProLiant BL685c node, watch the screen carefully during the power-on self-test,
and press the F9 key to access the ROM-Based Setup Utility (RBSU) to enable HPET as
shown Table 6-2.
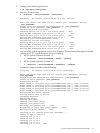
Table 6-2 Additional BIOS Setting for HP ProLiant BL685c Nodes
Set To This ValueOption NameMenu Name
Enabled
Linux x86_64 HPETAdvanced
Press the F10 key to exit the RBSU. The server automatically restarts.
15. Use the virtual power functions to turn off power to the server blade.
6.2 Making Settings on HP ProLiant Server Blades 35