


11
Setting up
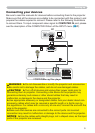
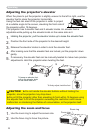
Connecting power supply
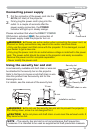
1.
Put the connector of the power cord into the
AC IN (AC inlet) of the projector.
2.
Firmly plug the power cord’s plug into the
outlet. In a couple of seconds after the
power supply connection, the POWER
indicator will light up in steady orange.
►Please use extra caution when connecting the power cord, as
incorrect or faulty connections may result in re and/or electrical shock.
• Only use the power cord that came with the projector. If it is damaged, consult
your dealer to get a new one.
• Only plug the power cord into an outlet whose voltage is matched to the power
cord. The power outlet should be close to the projector and easily accessible.
Remove the power cord for complete separation.
• Never modify the power cord.
WARNING
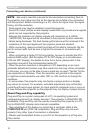
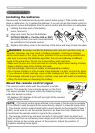
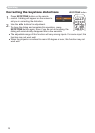
Using the security bar and slot
A commercially available anti-theft chain or wire can
be attached to the security bar on the projector.
Refer to the gure to choose an anti-theft chain or wire.
Also this product has the security slot for the
Kensington lock.
For details, see the manual of the security tool.
►Do not use the security bar and slot to prevent the projector
from falling down, since it is not designed for it.
WARNING
►Do not place anti-theft chain or wire near the exhaust vents. It
may become too hot.
CAUTION
• The security bar and slot is not comprehensive theft prevention
measures. It is intended to be used as supplemental theft prevention measure.
NOTE
Security bar
Security slot
Anti-theft chain or wire
Please remember that when the DIRECT POWER
ON function activated (40), the connection of
the power supply make the projector turn on.
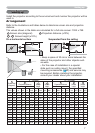
Installation surface
18 mm
18 mm
10 mm
12 mm
AC IN
Power cord