Pressure Switch / Recorder
Changing the Chart Paper
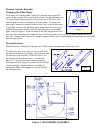
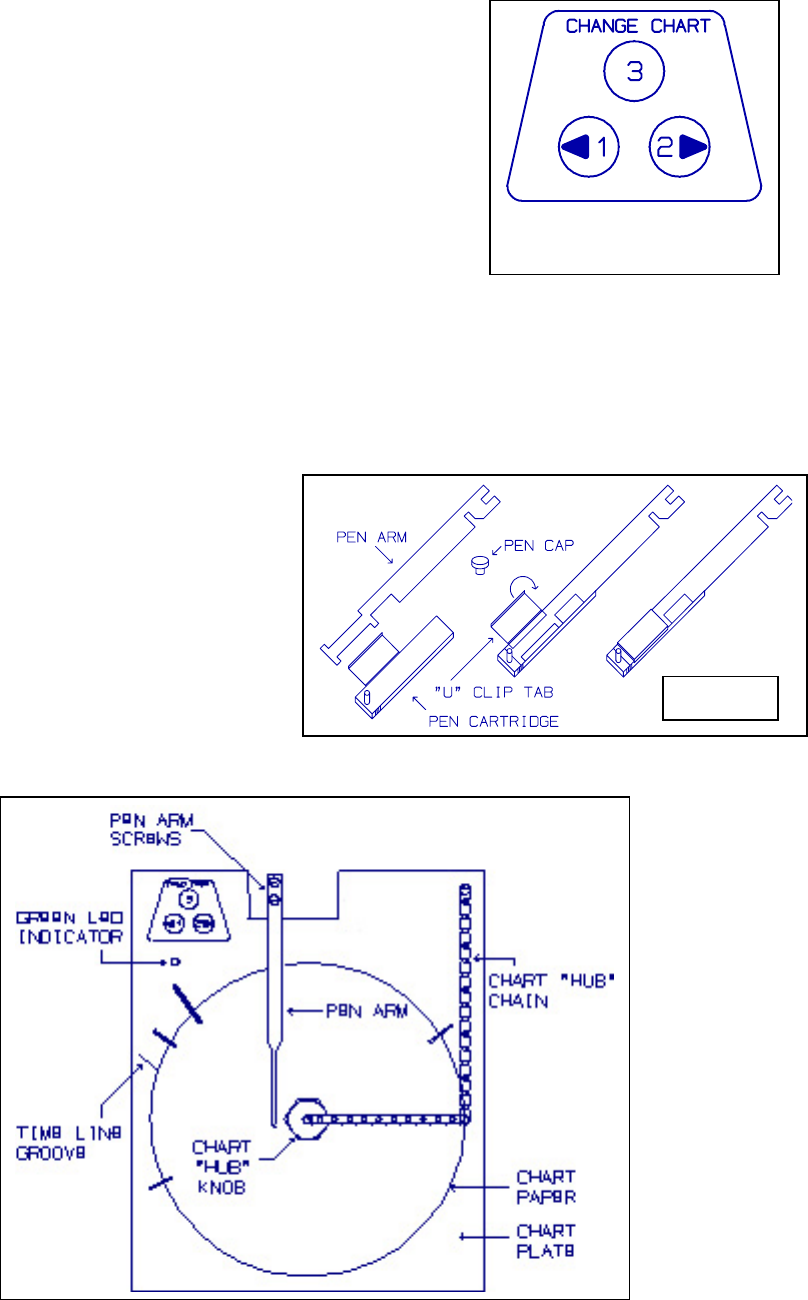
First, locate the “change chart” button (#3) located in the upper left
corner of the recorder. Press and hold this button for approximately one
(1) second until the pen begins to move to the left of the chart. Wait
until the pen has moved completely off of the chart. To remove the
chart paper, unscrew (counter-clockwise) the “hub” knob at the center
of the chart. Remove the old chart paper and position the new one so
that the correct time coincides with the time line groove on the chart
plate. Refer to Figure 3 for the location of the time line groove on the
left side of the chart plate. Re-attach the chart “hub” knob and screw securely (by hand) against the chart.
Press the “change chart” button (#3) again for approximately one (1) second until the pen begins to move back
onto the chart paper.
Pen replacement
Slide the used pen cartridge off the pen arm. Slide on new cartridge and remove tip cover.
To replace the pen, loosen the two screws that hold
the pen arm and the pen cartridge, and metal pen arm
be removed as an assembly. Refer to Figure 3 for
the location of the pen arm screws. Unsnap the
plastic “U” clip tab of the pen cartridge from the
metal pen arm (see Figure 2), remove and discard the
old pen cartridge. Replace the new cartridge by
opening the hinge and snapping it securely around
the metal pen arm.
Figure 3 - RECORDER ASSEMBLY
Fi
g
ure 2
Figure 1


