


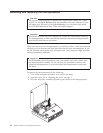
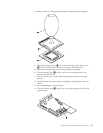

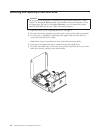


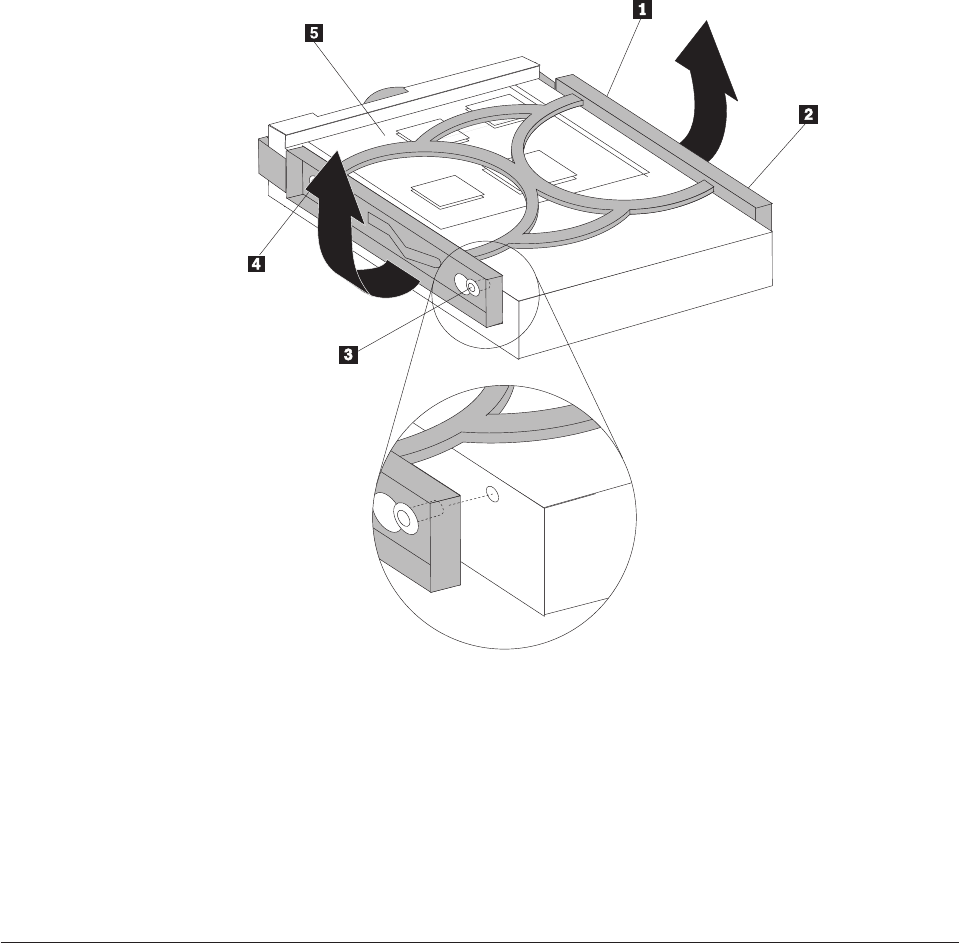
6.
Remove
the
old
hard
disk
drive
from
the
blue
bracket
by
flexing
the
bracket.
Do
not
touch
the
circuits
5
on
the
hard
disk
drive.
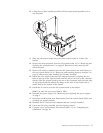
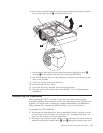
7.
Insert
the
new
hard
disk
drive
into
the
blue
bracket
aligning
the
pins
1
through
4on
the
bracket
with
the
holes
in
the
hard
disk
drive.
8.
Insert
the
hard
disk
drive
into
hard
disk
bay
with
the
circuits
facing
up
and
snap
it
into
position.
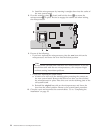
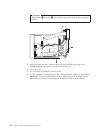
9.
Connect
a
power
connector
to
the
drive.
10.
Reconnect
the
CD
drive
cable.
11.
Lower
the
drive
bay
assembly
into
the
original
position.
12.
Close
the
cover
and
reconnect
the
external
cables
.
Go
to
“Completing
the
installation.”
Completing
the
installation
After
replacing
the
CRUs,
you
need
to
close
the
cover
and
reconnect
cables,
including
telephone
lines
and
power
cords.
Also,
depending
on
the
CRU
that
was
replaced,
you
might
need
to
confirm
the
updated
information
in
the
IBM
Setup
Utility
program.
See
″Starting
the
IBM
Set
Utility″
in
your
Quick
Reference.
To
complete
the
CRU
installation:
1.
Ensure
that
all
components
have
been
reassembled
correctly
and
that
no
tools
or
loose
screws
are
left
inside
your
computer.
See
“Locating
components”
on
page
2
for
the
location
of
various
components.
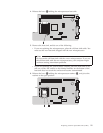
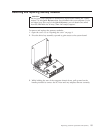
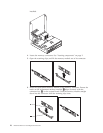
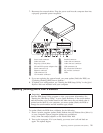
2.
Correctly
route
all
power
supply
cables
to
avoid
interference
with
the
drive
bay
assembly,
and
fold
the
ribbon
cables
1
and
2along
the
existing
crease
lines.
Replacing
customer
replaceable
units
(CRUs)
19