


11
DEUTSCH
ENGLISHFRANÇAISESPAÑOLITALIANOJAPANESECOMPL & WARR
Auto Setup OS/2
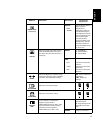
If the monitor is in standby
mode (STANDBY ON), it
may automatically turn off while
you are waiting for it to warm up.
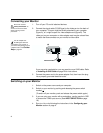
1. Turn on the monitor first; then the PC.
If the message CHECK SIGNAL CABLE is displayed, or if nothing is
displayed check:
• that the video interface cable is connected properly.
• the correct video adapter card is installed.
• the correct supported display mode is selected for your PC.
2. Wait approximately 15 minutes, until the monitor warms up.
3. Insert the diskette labelled ‘IBM Monitor Installation Disk’ into the
diskette drive.
4. Select
OS/2 S
YSTEM
,
S
YSTEMS
S
ETUP
,
S
YSTEM
. Select
S
CREEN
R
ESOLUTION
1280
X
1024
X
256
.
5. Select
S
CREEN
R
EFRESH
of
60H
Z
.
6. Close
S
YSTEMS
and restart your system.
7. At the OS/2 command prompt, select the
OS/2 F
ULL
S
CREEN
command.
8. Press mouse button 2 and select
S
ETTINGS
or
P
ROPERTIES
(depending on
your OS/2 version).
9. Select
S
ESSION
and then choose
W
IN
-OS/2 F
ULL
S
CREEN
.
10. Open the OS/2 full-screen window.
11. At the command prompt type
A:
and press ENTER.
12. Type
TESTPATS
and press ENTER.
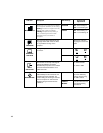
The size and diversity of
the dot pattern varies with
the screen resolution.
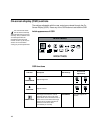
13. When the dot pattern appears, press the OSD Enter button to
display the initial OSD menu.
Position the mouse pointer
at the bottom center of the
screen. This allows
A
UTO
S
ETUP
to run properly.
14. Use an Arrow button (
-
or
+
) to select the I
MAGE
L
OCK
icon and
press the OSD Enter button to access the function.
15. Using an Arrow button (
-
or
+
), select
AUTOMATIC
and press the OSD
Enter button . This activates the
A
UTO
S
ETUP
procedure, which will
optimize the display settings with the provided test pattern.
The screen will dim, blink on and off several times, and you may notice
small changes to the test pattern.
(To abort the
A
UTO
S
ETUP
function, press the
ESCAPE
key.)