


12
Customizing Your Monitor
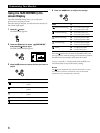
Locking the controls
You can protect adjustment data by locking the controls.
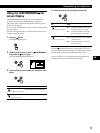
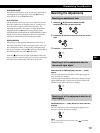
1 Press the button.
The MENU OSD appears.
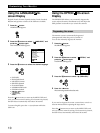
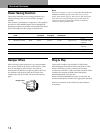
2 Press the ./> buttons to select “ OPTION,” and
press the
button again.
The OPTION OSD appears.
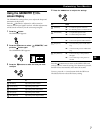
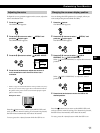
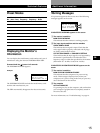
3 Press the ./> buttons to select “ (CONTROL
LOCK).”
4 Press the / button to select “ON.”
Press the
button once to return to the MENU OSD, and
twice to return to normal viewing. If no buttons are pressed,
the OSD closes automatically after about 30 seconds.
Only the u (power) switch, EXIT, and “
(CONTROL
LOCK)” of the “
OPTION” OSD will operate. If any other
items are selected, the
mark appears on the screen.
To cancel the control lock
Repeat steps 1 through 3 above and press the / button to
select “OFF.”
DEGAUSS
ON
OPT I ON
CONTROL
LOCK
OFF ON
OPT I ON
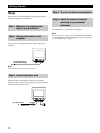
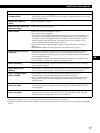
Using the HELP On-screen
Display
The HELP OSD contains helpful hints and information
about this monitor. If your monitor is displaying symptoms
that match those listed in the HELP OSD, follow the on-
screen instructions to resolve the problem. If the symptoms
do not match those listed in the HELP OSD or if the
problem persists, see “Troubleshooting” on page 16.
1 Press the button.
The MENU OSD appears.
2 Press the ./> buttons to select “ HELP” and press
the
button again.
The HELP OSD appears.
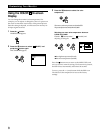
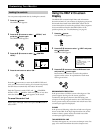
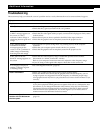
3 Press the ./> buttons to select a HELP menu item
and press the
button again.
Instructions or information to resolve the problem
appears on the screen. An explanation of each menu
item is given below.
RECOMMENDED RESOLUTION
If the picture does not fill the screen to the edges or if the
picture appears too large for the screen, adjust the
resolution to the figures shown in the OSD using your
computer. If the input signal matches one of this monitor’s
factory preset modes, the resolution and refresh rate of the
current input signal are displayed.
FLICKER
If the picture is flickering, adjust the refresh rate to figures
shown in the OSD. If the input signal matches one of this
monitor’s factory preset modes, the refresh rate of the
current input signal is displayed.
THIN HORIZONTAL LINE
The lines that appear on your screen are damper wires. See
page 13 for more information about the damper wires.
RETURN TO MAIN MENU
RECOMMENDED RESOLUTION
FLICKER
TH IN HORI ZONTAL L I NE
DISTORTED SHAPE
OUT OF FOCUS
DISCOLORAT ION
HELP