


33
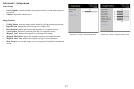
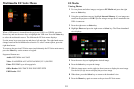
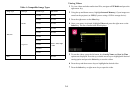
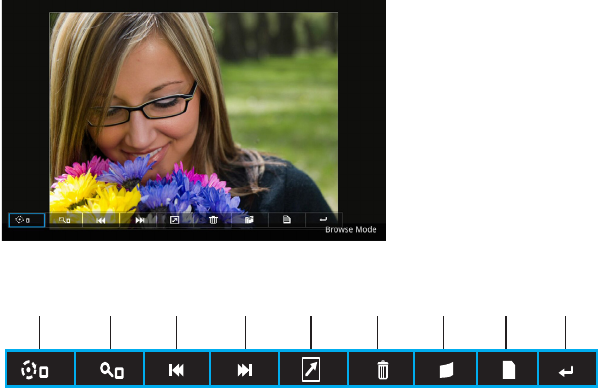
To display a control bar to control the photos:
1 Press the Menu key on the remote or keypad.
2 Use the left and right arrows to highlight a control bar function.
3 Press the Select key to activate the highlighted function.
Rotate DeleteZoom InfoSave ReturnReturnFast
Forward
Rewind
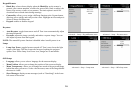
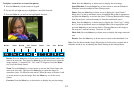
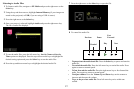
Rotate: Press the Select key or down arrow to activate the Rotate feature (the
menu icon turns red). Then press the Select key or the arrow keys to rotate the
image (options = 0 (normal), 90°, 180°, and 270° degrees). Press the Menu
key to exit the Rotate feature.
Zoom: Press the Select key or down arrow to activate the Zoom feature (the
menu icon turns red). Then press the Select key to zoom the image (0 =
normal/no zoom; 1-4 different zoom ratios). When the zoom is between 1 and
4, use the arrows to pan the image. Press the Menu key to exit the zoom
feature.
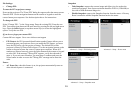
Previous: Pre
ss the Select key or down arrow to display the previous image.
Next: Pres
s the Select key or down arrow to display the next image.
Start Slideshow: Pre
ss the Select key or down arrow to start the Slideshow.
Slideshow must be enabled in Photo Settings menu.
Delete: Press
the Select key or down arrow to display the “Sure Delete?”
dialog box. Use the up and down arrows to highlight Ye s or No as appropriate,
and press the Select key to activate the choice. Choosing Yes deletes the image
from the projector’s internal memory or from the multimedia source.
Save: Pre
ss the Select key or down arrow to display the “Sure Copy?” dialog
box. Use the up and down arrows to highlight Yes or No as appropriate, and
press the Select key to activate the choice. Choosing Ye s saves the image to
the projector’s internal memory. Total size is 3.8GB.
Photo Info: Press the Select key or down arrow to display the image name and
size.
Return: Pre
ss the Select key or down arrow to return to the thumbnail view.
Note: Y
ou can adjust whether image files display as full screen or original and in
slideshow mode or not, by adusting the Photo Settings in the Settings menu.