


18
Controlling the projector via scheduling
The projector can be automatically controlled via scheduling.
NOTE:
• You can schedule the following control events: Power ON/OFF, Input Source.
• There are 3 types of Scheduling, 1) daily 2) day of the week 3) specific date.
• The priority for scheduled events is as follows 1) specific date 2) day of the week 3) daily.
• Up to five specific dates are available for scheduled events. Priority is given to those with the lower numbers
when more than one event has been scheduled for the same date and time (e.g., “Specific day No. 1” has priority
over “Specific day No. 2” and so on.
• Be sure to set the date and time before enabling scheduled events.
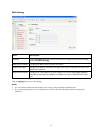
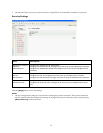
Date/Time Settings
The Date/Time setting can be adjusted via a web browser.
Example: If the IP address of the projector is set to 192.168.1.10:
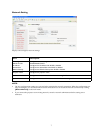
1 Click [Date/Time Settings] on the main menu and configure each item. Refer to the [Date/Time Settings] item
in [Configuring and Controlling the Projector via a Web Browser] for further information.
2 Click the [Apply] button to save the settings.
NOTE:
• A Network Restart is required after the Daylight Savings Time or SNMP configuration settings have been
changed.
• The battery for the built in clock may be dead if the clock loses time even when the DATE and TIME have been set
correctly. Replace the battery by following the instructions on replacing the battery in the projector’s User’s
Guide.
• The Internal Clock’s time may not remain accurate. Using SNMP is recommended to maintain accurate time.
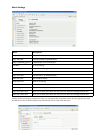
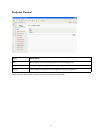
Schedule settings
Schedule settings can be configured from a web browser.
Example: If the IP address of the projector is set to 192.168.1.10:
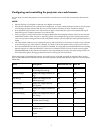
1 Click [Schedule Settings] on the main menu and select the required schedule item.
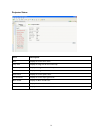
2 Click the [Enable] check box to enable scheduling.
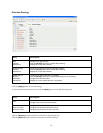
3 Enter the Date (Month/Day) for specific date scheduling.
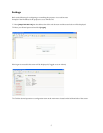
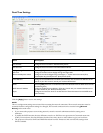
4 Click [Add] and set the hour, command and parameters and click [Add This Schedule] when you want to add a
command.
5 Click the [Delete] button when you want to delete a schedule.
6 Click the [Apply] button to save the settings.
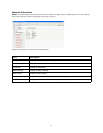
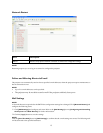
There are three types of scheduling.
1 Daily: Perform the specified operation at a specified time every day.
2 Sunday ~ Saturday: Perform the specified operation at the specified time on a specified day of the week.
3 Specific Date: Perform the specified operation on the specified date and time.
NOTE:
• When the schedule function is used, the power cord must be connected to the projector and the outlet and the
power switch must be turned on, [|]. The schedule function does not work when the power switch is turned off or
the breaker in a room is tripped.