


2
Network Functions
This projector is equipped with the following network functions.
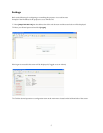
Configuring and Controlling the Projector via a Web Browser
You can change the settings of or control the projector via a network by using a web browser from a PC that is con-
nected to the same network.
Failure & Warning Alerts via E-mail
The projector can automatically send an alert to specified e-mail addresses when the projector requires maintenance or
has encountered an error.
Projector Management via SNMP
This projector is SNMP (Simple Network Management Protocol) compliant, allowing you to monitor it from a remote
location using SNMP software.
Controlling the Projector via Scheduling
You can schedule the projector to perform various functions according to the DATE and TIME.
Before using the network functions
To use the network functions of this projector, the projector must be configured to suit your network. Consult with
your network administrator before connecting the projector to your network. Incorrect network configuration of this
projector may cause problems on your network. Connect to the Gateway (The router/PC that forwards traffic to a des-
tination outside of the subnet of the transmitting device) from the network terminal on the projector using a CAT-5
cable and configure the following settings.
If using a network with DHCP enabled:
The projector’s network settings can be configured automatically when [DHCP] on the network menu is set to On
(the checkbox is checked). Please refer to DHCP in the User’s Guide Network menu. If a fixed / static IP address is
required, please configure your projector according to the steps in the following section.
If using a network system that does not have DHCP enabled or if using a fixed IP address on a network
system equipped with DHCP enabled:
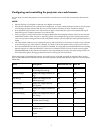
Configure the following settings on the network menu.
1 [DHCP]: Disable DHCP (Set [DHCP] to Off (the checkbox is unchecked).
2 [IP ADDRESS]: Enter an appropriate IP address for the projector to connect to your network.
3 [SUBNET MASK]: Enter an appropriate SUBNETMASK for the projector to connect to your network.
4 [DEFAULT GATEWAY]: Enter an appropriate Gateway (the router/PC that forwards traffic to a destination out-
side of the subnet of the transmitting device) address for the projector to connect to your network.