


27
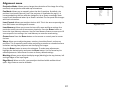
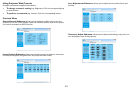
Alignment menu
Projection Mode: Allows you to change the orientation of the image for ceiling
mounted, rear-projection and table-top orientations.
Fan Mode: Allow
s you to manually select the fan tilt position. By default, the
position is horizontal (Normal), but if the projector is installed at an angle, it is
recommended that the fan mode be changed to Up or Down accordingly. Note:
Lamp life will be affected when Up or Down is selected. The fan speed also changes
with each orientation.
Lens Control: A
llows you to adjust the lens shift. This is the same as pressing the
Lens Shift button on the keypad or remote.
Lens Memory: A
llows you to save the lens shift, zoom and focus settings for a
particular source into one of ten memory locations. Press the Enter button to
access the Lens Memory submenu. Use the Save Memory feature to save up to 10
source-specific lens settings. Use Load Memory to restore a saved setting.
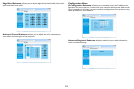
Center Lens: Pr
ess the Enter button on the remote or control panel to center
the lens.
Warp: Allo
ws you to adjust keystone, rotation, pincushion/barrel, and corner
positions. This is especially useful when projecting on uneven or rounded surfaces
and when stacking two projectors and overlaying the images.
Press the En
ter button to access the submenu. To make warp adjustments,
highlight the desired option and press the Enter button. Use the arrow keys to
make adjustments. Select Reset to return to factory default settings.
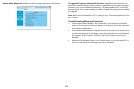
Blanking: Allo
ws you to adjust the display range (blanking) at the top, bottom, left
and right edges of the input signal.
Edge Blend: Wh
en set to On, you can adjust the blend width and black level
uplift. Align Patterns are also available.
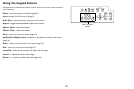
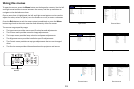
INPUT PICTURE LAMPS ALIGNMENT CONTROL SERVICE
Projection Mode < Front >
Fan Mode < Normal >
Lens Control Enter
Lens Memory Enter
Center Lens Execute
Warp Enter
Blanking Enter
Edge Blend Enter
Alignment menu