


3
Install the Ceiling Mount Base Box on the Ceil-
ing
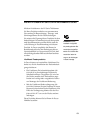
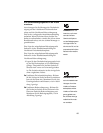
WARNING
: The ceiling
structure must be able to
support at least 5 times
the weight of the projector
and mounting hardware. If
not, it must be reinforced
according to your local
building codes.
Instructions for installing the ceiling mount on
the LiteMount False Ceiling Plate and the Lite-
Mount Pipe Tubing Extension are given in this
installation guide. If you have not purchased
either of these products, consult a professional
contractor or other facilities professional to
ensure a safe installation.
Please refer to the LiteMount False Ceiling Plate
and LiteMount Pipe Tubing Extension installa-
tion instructions for lists of included hardware.
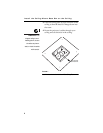
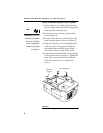
1
Center the ceiling mount base box on the ceil-
ing plate as shown in Figure 1. Make sure the
front of the base box faces forward toward
your projection screen. The front side of the
base box is the only surface without drilled
holes.
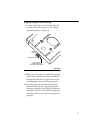
2a
LiteMount False Ceiling Plate - Align the
holes in the base box with the threaded studs
on the plate. Install the 4 washers and nuts as
shown in Figure 1.
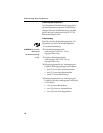
NOTE
: Refer to the
Installation Instructions
that came with the Lite-
Mount False Ceiling Plate
and the LiteMount Pipe
Tubing Extension for
important additional infor-
mation.
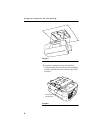
2b
LiteMount Pipe Tubing Extension - Line up
the holes in the base box with the holes in the
plate at the end of the pipe extension. Install
the hardware as shown in Figure 2.