


Attach the Mounting Plate to the Projector
6
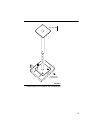
Attach the Mounting Plate to the Projector
1
Set the projector on a table with the bottom
side up. Align the holes in the mounting plate
with the holes in the projector.
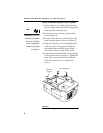
CAUTION
: Use only the
hardware that is provided
with the LP 740 Ceiling
Mount. Using different
hardware may damage
your projector.
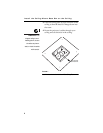
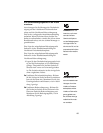
2
Insert the 3 screws into the 3 quick release
sleeves (Figure 3).
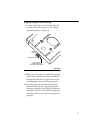
3
Loosely attach the screws and sleeves to the
holes in the projector as shown in Figure 3.
4
Align the keyholes in the mounting bracket
with the screws in the projector. Slide the
mounting bracket until the quick release
sleeves are at the top of the keyhole slot.
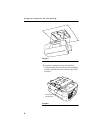
5
Attach the 5mm knurled knob to the projector
in the location shown in Figure 3. Tighten the
three 5mm screws and the 5 mm knurled
knob. Be careful not to over-tighten the
screws.
F
IGURE
3
Attach the mounting plate to the projector
quick release screws
knurled knob
goes here