2
NS-24EM51A14 24” Widescreen LED Monitor
www.insigniaproducts.com
Features
Package contents
• 24” Widescreen LED monitor
•Power cable
•VGA cable
•Quick Setup Guide
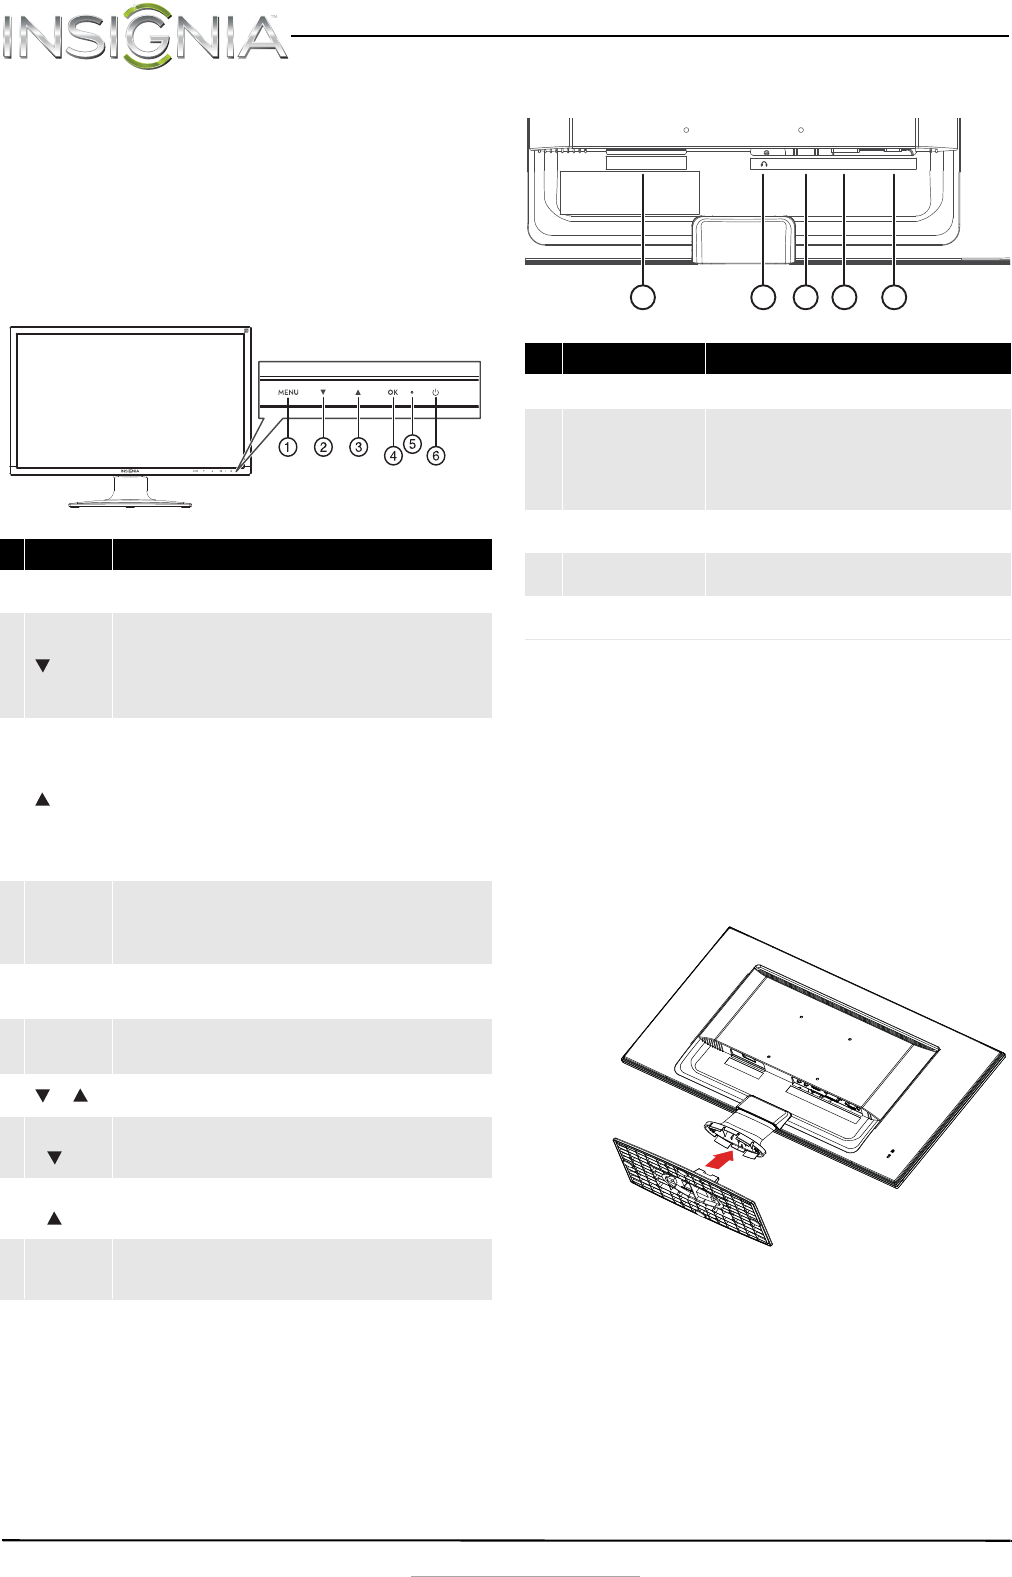
Front view
Rear view
Setting up your monitor
Installing the stand base
To install the stand base:
1 Remove the monitor from the box and lay it face
down on a table, with a soft cloth or towel
beneath it to protect the screen.
2 Insert the base into the stand column until it
clicks into place.
# Component Description
1MENU
Press to open the on screen display (OSD) menu and enter menu
mode. Press again to exit the OSD and return to display mode.
2
In menu mode, press to scroll down or decrease settings in the OSD
menus.
In normal operation, press to access the Color Vision Mode menu.
In normal operation mode, when using a VGA connection, push and
hold for three seconds to auto adjust the image.
3
In menu mode, press to scroll up or increase settings in the OSD
menus.
In normal operation, press to access the Audio Adjust menu.
In normal operation mode, when using an HDMI connection, push
and hold this button for three seconds to automatically switch from
mute to unmute.
Note: The Audio Adjust menu is only available when using an HDMI
connection.
4 OK
In menu mode, press to confirm a selection or setting in the OSD
menus.
In normal operation, press to enter the input select menu. You can
choose VGA, DVI, HDMI, or Auto.
5
LED
indicator
Turns blue when the monitor is on. Turns off when the monitor is
turned off.
6
Power
On/Off
Press to turn the monitor on. Press again to turn the monitor off.
+
In normal operation, press simultaneously to reset contrast,
brightness, and backlight.
MENU
+
In normal operation, press simultaneously to lock/unlock the power
button functionality. (So the monitor cannot be turned on or off
with the Power button.)
MENU
+
In normal operation, press simultaneously to lock/unlock the MENU
button functionality. With the MENU button locked, only the
POWER button will work.
MENU + OK
In normal operation, press simultaneously to switch between
similar PC timings (for example 720 x 400 @70 Hz and 640 x 400 @
70 Hz).
# Item Description
1 Power connector
Plug the AC power cord into this connector.
2 Headphone jack
Plug an optional headphone into this jack.
Note: The headphone jack only provides an audio
signal if you are using an HDMI connection and the
audio is enabled for the HDMI output of your
computer.
3HDMI jack
If your computer has an HDMI jack, connect an HDMI
cable (not included) to your computer and this jack.
4 DVI jack
If your computer has a DVI jack, connect a DVI cable
(not included) to your computer and this jack.
5VGA jack
If your computer has a VGA jack, connect the VGA
cable (included) to your computer and this jack.
1234
5
POWER IN
AC
HDMI
DVI VGA
NS-24EM51A14_12-0730_MAN_V1_EN.book Page 2 Wednesday, September 4, 2013 2:44 PM


