3
24” Widescreen LED Monitor
www.insigniaproducts.com
Removing the stand to mount the monitor on
a wall
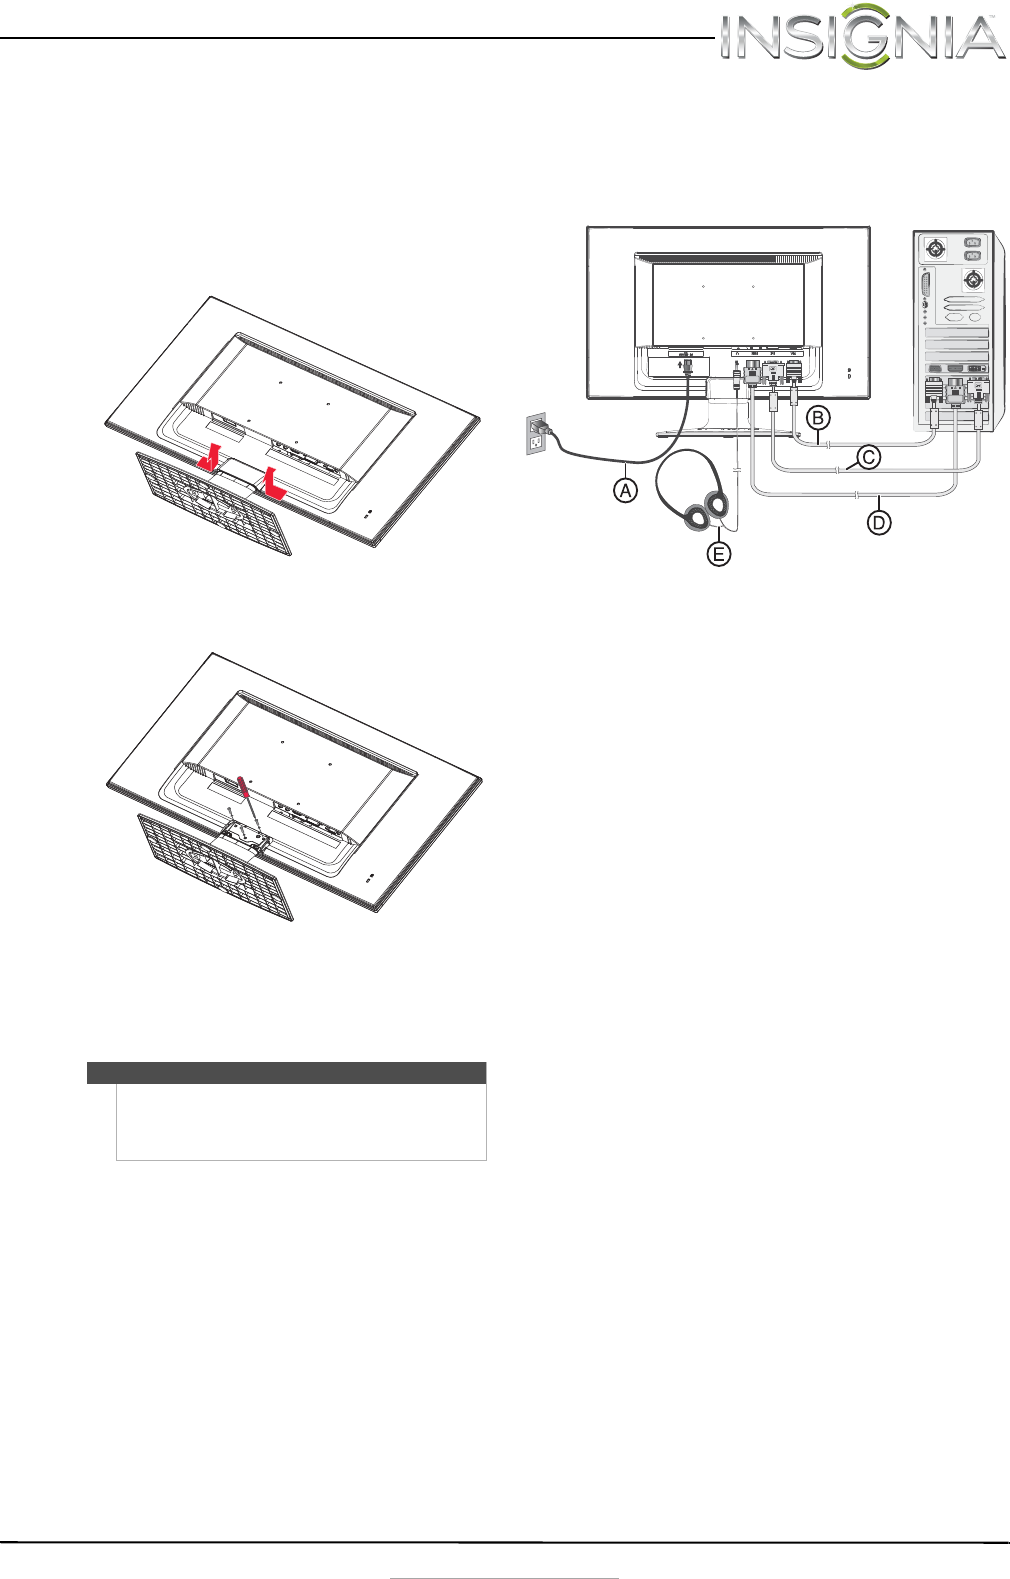
To remove the stand base:
1 Lay the monitor face down on a table, with a
soft cloth or towel beneath it, to protect the
screen.
2 Squeeze the sides of the column cover and pull
to remove it.
3 Using a Phillips screwdriver, remove the three
screws that secure the column to the monitor.
4 Wiggle the column loose from the monitor.
5 Follow the instructions that came with your
mounting kit (not included) to mount your
monitor on the wall.
Making connections
To connect your monitor:
1 Connect the power cord (A) to the monitor, then
to a properly grounded AC outlet.
2 Make sure that both the monitor and the
computer are powered off. Connect the
included VGA cable (B) to the output of the
computer, then to the input of the monitor.
-OR-
Connect an HDMI cable (D) from the HDMI
output of the computer to the HDMI input of
the monitor. No HDMI cable is included.
-OR-
Connect a DVI cable (C) from the DVI output of
the computer to the DVI input of the monitor.
No DVI cable is included.
Optional: You can also connect external
speakers or headphones (E) to the headphone
jack. The headphone jack is only enabled when
receiving audio over HDMI. Please consult your
hardware or OS documentation to ensure that
HDMI audio is enabled. Neither headphones
nor speakers are included.
3 Turn on the computer, then turn on the monitor.
4 If you are using Windows, you may need to set
the resolution and refresh rate (example: 1920 x
1080 @ 60 Hz).
•Windows 8 or Windows 7:
1 Go to your desktop.
2 Right-click on your desktop, then click
Screen resolution.
3 Click the drop-down list next to Resolution,
then move the slider to the resolution you
want.
4 Click Advanced Settings.
5 Click the Monitor tab, and then select a
new refresh rate in the Screen refresh rate
drop-down.
6 Click OK, then click Keep changes to use
the new resolution and refresh rate, or click
Revert to go back to the previous settings.
Note
To mount your monitor, purchase a mounting kit that
is compatible with a 100 x 100 VESA pattern. The
mounting kit will contain M4 screws which are
appropriate for the size of this monitor.
NS-24EM51A14_12-0730_MAN_V1_EN.book Page 3 Wednesday, September 4, 2013 2:44 PM
