Duplex Unit
– 1 –
4657-7744-12
■
Unpacking the Duplex Unit
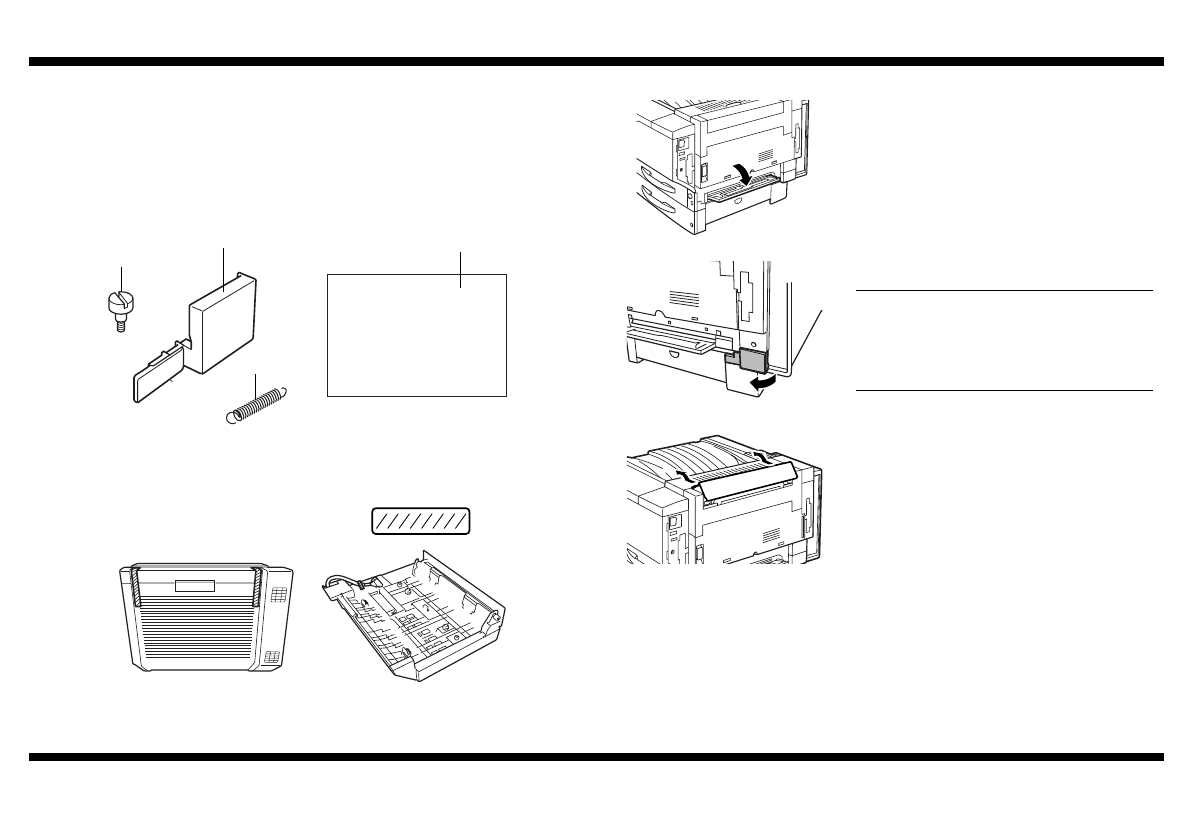
1. Remove the duplex unit from its box, and then check that the following accessories
are also enclosed.
(1) Flat-head screws. . . . . . . . . . . . . . . . . . . . . . . . . . . . . . . . . . . . . . . . . . . . . 2
(2) Wiring cover . . . . . . . . . . . . . . . . . . . . . . . . . . . . . . . . . . . . . . . . . . . . . . . . 1
(3) Spring . . . . . . . . . . . . . . . . . . . . . . . . . . . . . . . . . . . . . . . . . . . . . . . . . . . . . 1
(4) Setup Instructions (this manual) . . . . . . . . . . . . . . . . . . . . . . . . . . . . . . . . . 1
2. Remove all packing material from the duplex unit.
■
Preparing to Install the Duplex Unit
1. Turn off the copier, unplug the power cord
and the interface cable from the copier.
Then, open the manual bypass tray.
2. Remove the wiring cover from the copier.
NOTE
The wiring cover removed from the copier
will not be installed again; however, it should
be stored in a safe place in case it will be
needed later for transporting the copier.
3. Push up on the upper-right cover as shown
in the illustration, and then remove the cover.
C4657U001AA
(2)
(4)
(1)
(3)
C4657U016AA
Tape
C4657U003AA
C4657U004AA
C4657U013AA
NEXT


