


2-5
GETTING STARTED
2
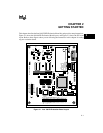
4. Apply power to the host PC and the evaluation board.
When power is applied to the board, the message “i186 Ex 3V/5V EV” should appear
across the LCD display. This message indicates board initialization is complete. If the
message does not appear, press the reset button (S1).
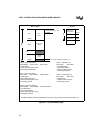
Connect one end of the standard 9-pin AT-type serial connector to header P1 on the
evaluation board. Connect the other end to the COM1 port of the host computer. (You can
use COM2 if you need to, but you’ll have to specify COM2 when you run the Monitor
Software.) The PC and board communicate at 9600 baud.
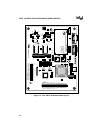
After connection to the PC, the processor may appear to be held in the reset state. The
reason this occurs is that one of the host signals is used to reset the board. This signal may
be active prior to invoking the ECM86 host software on the PC. The PC and board
communicate at 9600 baud.
5. Insert the ECM-86 floppy disk provided with your kit in the floppy drive on the host PC.
You can run the ECM86 program directly from the diskette or copy the contents of the
diskette to your hard drive.
6. At the DOS prompt, change to the floppy disk drive (or to the directory to which you
copied the files in the previous step) and enter this command:
ECM86
After a moment, the PC should display the ECM86 monitor screen.
Complete information on using the monitor software is located in Chapters 4 and 5.