


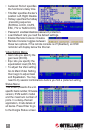
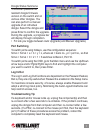


Setup/Installation
CAUTION: Before connecting to the Cat5 KVM Switch, all PS/2
computers should be powered off unless the PS/2 interface has already
been initialized and operating; otherwise, the switch system might not
be properly set up. USB computers do not have this limitation.
1. Connect the shared keyboard, mouse and monitor to the console
connectors on the rear of your (master) Cat5 KVM Switch. Power on
the switch by connecting and plugging in the power adapter cord.
NOTE: If using a single Cat5 KVM Switch in a non-cascaded application,
go directly to Step 4. To daisy-chain switches, continue to Step 2. You
can daisy-chain up to 8 levels of Cat5 KVM Switches, with as many as
64 (8-port) or 128 (16-port) computers connected.
2. Use the enclosed daisy-chain cable (HD15 male to female) to connect
the female Daisy Chain Out port of the master (rst) switch to the male
Daisy Chain In port of the second switch. Connect the power adapter
cord to the second switch to power it on.
3. If you have yet another switch to be daisy-chained, just repeat Step 2
to connect them. You can daisy-chain up to 8 units of KVM switches.
Plug a terminator onto the Daisy Chain Out port of the last unit. (No
terminator required if only using a single unit.)
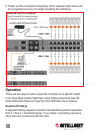
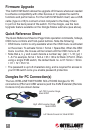
4. With the Cat5 KVM switch — or daisy-chained switches — powered
up and initialized, use an INTELLINET NETWORK SOLUTIONS Dongle
for Cat5 KVM Switch (Model 503938 for USB; Model 503921 for PS/2)
to connect the computer(s) to a computer port or ports on the rear of
the switch(es). NOTE: If using a PS/2 dongle, connect to the mouse
port before the keyboard port for a proper initializing sequence.
3