


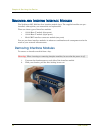

Configuring the Device for Telnet and WebUI Sessions
NetScreen-ISG 2000 33
The following CLI command creates an access policy that permits all kinds of outbound
traffic, from any host in your trusted LAN to any device on the untrusted network.
set policy from trust to untrust any any any permit
Use the save command to store changed information.
C
ONFIGURING
THE
D
EVICE
FOR
T
ELNET
AND
W
EB
UI S
ESSIONS
You can also use Telnet (or dialup) to establish console sessions with the
NetScreen-ISG 2000. You can start management sessions using the NetScreen WebUI, a
web-based GUI management application.
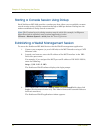
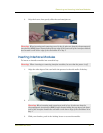
Starting a Console Session Using Telnet
To establish a Telnet session with the NetScreen-ISG 2000:
1. Connect an RJ-45 cable from the MGT interface to the internal switch, router, or
hub in your LAN (see “Setting the IP Address for the Trust Zone Interface” on
page 31).
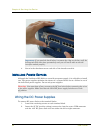
2. Open a Telnet session, specifying the current MGT interface IP address. For
example, in Windows, click Start > Run, enter telnet ip_addr (where ip_addr
is the IP address of the MGT interface), then click OK.
For example, if the MGT interface has an IP address of
10.100.2.183
, enter:
telnet 10.100.2.183
3. At the Username prompt, type your admin name (default is netscreen).
4. At the Password prompt, type your password (default is netscreen).
5. (Optional) By default, the console times out and terminates automatically after
10 minutes of idle time. To change this timeout interval:
set console timeout number
where number is the length of idle time in minutes before session termination.
To prevent any automatic termination, specify a value of 0.
Important: Your network might require a more restrictive policy than the one created in
the previous example. The example is NOT a requirement for initial configuration. For
detailed information about access policies, see the NetScreen Concepts and Examples
ScreenOS Reference Guide.
Note: Once you have set the port and interface IP address, it is highly advisable to change
the admin name and password immediately. For more information, see “Changing Your
Admin Name and Password” on page 30.
Note: Both admin name and password are case-sensitive.