Chapter 3---Service Adjustments
3-18 Model 330, 340SC, 370SC Service Manual
3.11 Arc Lamp Alignment and Focus
The Arc Lamp must be realigned and refocused whenever the lamp is replaced or
becomes defocused or misaligned from physical shock to the projector.
Refocusing only may be required if the Arc Lamp has been in use for a long time.
Adjustment procedures for Model 330 projectors differ from those for the Model
340SC and Model 370SC projectors and are each detailed in the following
sections.
Model 330 Arc Lamp Alignment and Focus
To check Model 330 Arc Lamp alignment, confirm the "hot spot" (brightest area)
of the screen is centered on a flat field test pattern.
If the hot spot is not centered, the Arc Lamp needs alignment.
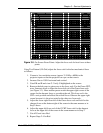
To check if focusing is needed, use a flat field test pattern to measure the
brightness at the center of the screen and at the corners with a light meter, using
all four (4) corners to determine the roll-off. The roll-off (gradual decrease in
brightness from center to corners) should be between 2:1 and 4:1.
Do not
try to
compensate for a dim corner by adjusting the Arc Lamp—dimness in one or two
corners is usually caused by variations in the
ILA
®
assemblies and will be
corrected by Shading adjustments. Perform the Arc Lamp focusing procedure
only if
the roll-off in all four (4) corners is too high.
CAUTION!
In the interest of safety, please read
these entire procedures,
prior to performing any adjustments
, in
order to become familiar with the special
NOTES
and
CAUTIONS
indicated.
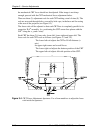
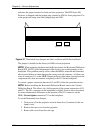
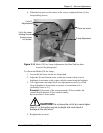
To align the Model 330 Arc Lamp (refer to Photo 3-2):
1. Use a long-handled Hexhead tool (a long handle helps keep fingers away
from Ignitor terminals) to loosen the four (4) Arc Lamp holding screws
very slightly, just so that the washers under the screwheads become loose
enough to move on the shaft.
CAUTION!
Be careful to not touch the Arc Lamp—it
is very hot! Be especially careful when loosening the bottom screw
so that the shaft of the Hex tool does not touch the Ignitor terminals
to the right of the tool.
2. Insert 2 Allen wrenches in the X and Y adjustment screws.
3. Turn the Allen wrenches in or out to center the hot spot on the screen.


