


5
ENGLISH
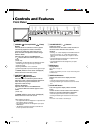
7 BLUE CHECK button
Displays only the blue signals.
• The button lights while this function is activated.
• Pressing the button again restores the normal screen.
By using this function with the standard color-bar
currently used, you can check if CHROMA (picture
color density) or PHASE (picture hue) is adjusted
properly.
Also you can check if “COMPO. LEVEL” (the
adjustment level of the component signal) is
adjusted properly for the component signal or the
SDI signal.
NOTE:
This function is not available to the RGB signal.
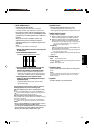
1 Display the standard color-bar currently used
on the screen.
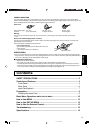
2 Press the BLUE CHECK button.
The following display appears on the screen.
3 If the brightness of the blue bars on the left
and right sides are the same, CHROMA
(picture color density) is adjusted properly.
• For the component signal or the SDI signal, if the
brightness of the blue bars on the left and right sides
are the same, “COMPO. LEVEL” is adjusted properly.
4 If the brightness of two blue bars in the
middle are the same, PHASE (picture hue) is
adjusted properly.
• PHASE should be checked only when the NTSC
signal is being input.
If the brightness of each blue bar is different, make the
following adjustment in the blue checking state:
When the composite signal or the Y/C (S-video) signal is being
input:
By using the CHROMA/PHASE button and the VOLUME/SELECT
(– +) buttons, adjust CHROMA or PHASE so that brightness of the
blue bars on the left and right sides are the same.
When the component signal or SDI signal is being input:
Press the MENU button to display MENU, select “COMPO. LEVEL” by
pressing the %/fi buttons.
Then, adjust “COMPO. LEVEL” by pressing the VOLUME/SELECT
(– +) buttons so that brightness of two blue bars in the middle are
the same.
• Be sure to adjust CHROMA for the composite signal or the Y/C
(S-video) signal before adjusting “COMPO. LEVEL.”
If you change the CHROMA adjustment for other signal formats
than the component signal after “COMPO. LEVEL” has been
adjusted, you need to adjust “COMPO. LEVEL” again.
8 ASPECT button
Changes the aspect ratio from 4:3 to 16:9.
• The button lights while the aspect ratio is 16:9.
• Pressing the button again returns the aspect ratio to 4:3.
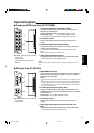
9 INPUT SELECT buttons
Select an input to display.
A: Select the video signal input to the VIDEO A terminal
and the audio signal input to the AUDIO A terminal.
B: Select the video signal input to the VIDEO B terminal
and the audio signal input to the AUDIO B terminal.
\ When both an Y/C (S-video) signal and a composite signal
are input to the VIDEO B terminal, the Y/C signal has
priority over the composite signal.
C/D (SLOT):
Select the signal input to the input card installed in the
input card slot on the rear panel.
\ For details about how to select the input signal through the
input card, see pages 7 and 8.
• The corresponding button of the input currently selected
lights up.
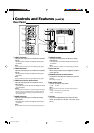
p Power lamp
Unlit: The main power is off.
Orange: The main power is on and the monitor is in stand-
by mode.
Green: The monitor is on.
q Stand-by button
Turns on and off the monitor when the main power
is on.
NOTE:
You can set the delay time between when the stand-by button is
pressed and when the monitor actually turns on. See “RUSH
DELAY” on page 12.
w Speaker
A built-in speaker is on the side panel.
Blue
Blue
Blue
Blue
[04-09]_TM-H150CG.p65 04.1.17, 4:05 PM5