


84 English
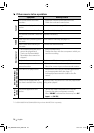
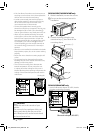
Installing the Unit
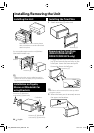
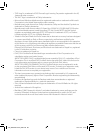
Bend the tabs of the mounting sleeve
with a screwdriver or similar utensil and
attach it in place.
For more stable attachment the unit (DDX790/
DDX770/DDX7070BT only)
Bracket
Accessory 8
⁄
• Make sure that the unit is installed securely in
place. If the unit is unstable, it may malfunction
(eg, the sound may skip).
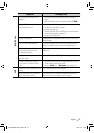
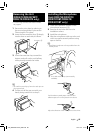
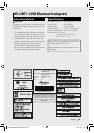
Installation on Toyota,
Nissan or Mitsubishi Car
using Brackets
Car Bracket
Accessory 3 (M5x6mm)
or accessory 4 (M5x7mm)
Accessory 3 (M5x6mm)
or accessory 4 (M5x7mm)
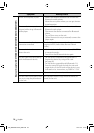
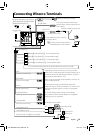
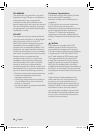
Installing the Trim Plate
1 Attach accessory 5 to the unit.
Accessory 5
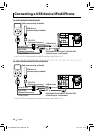
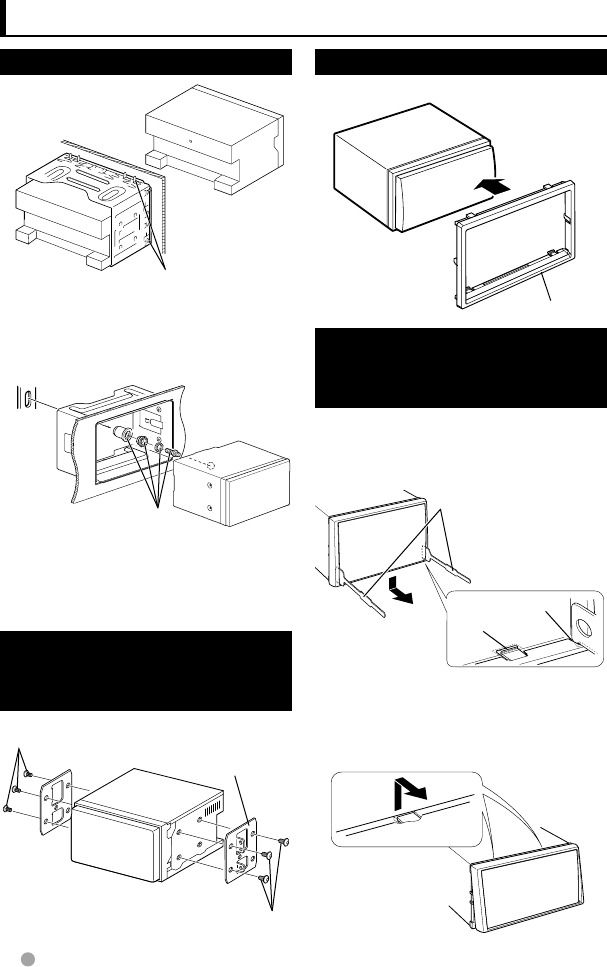
Removing the Trim Plate
(DDX470/DDX4070BT/
DDX370/DDX3070 only)
1 Engage the catch pins on the extraction
key 6 and remove the two locks on the
lower part. Lower the frame and pull it
forward as shown in the figure.
Accessory 6
Lock
Catch
⁄
• The frame can be removed from the top side in
the same manner.
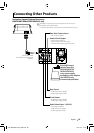
2 When the lower part is removed, remove
the upper two locations.
Installing/Removing the Unit
EN_GET0907-001A_KR.indb 84 12/11/13 10:14