Chapter 4 : DEVICE OPERATION
4.1 Standalone Mode (Copy)
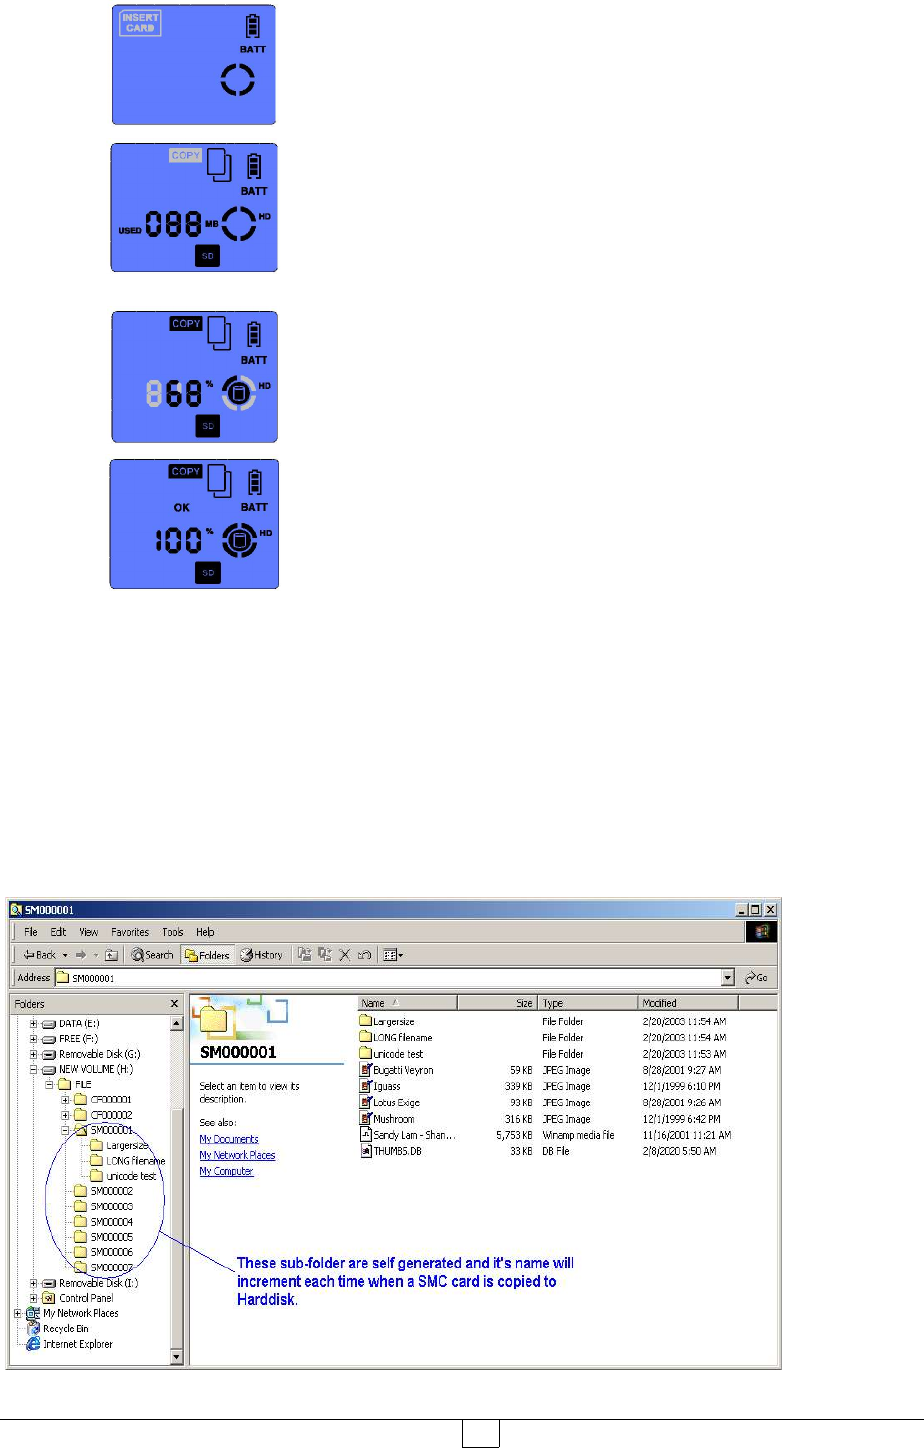
Step 1 :
Power ON the device by pressing [POWER] button for 3
seconds. The LCD will turn on, the {INSERT CARD} icon
will flash prompting you to insert a Memory Card.
Step 2 :
Insert the memory card (eg. SD card) into the appropriate
media slot, the device will detect the type of Memory Card
inserted, and its data size and show them on the LCD. The
{COPY} icon will flash prompting that the device is ready for
data backup.
Step 3 :
Press the [ENTER] button to start copy, the LCD icons will
display the operating status, indicating the percentage of data
being copied.
Step 4 :
When copy is completed, the LCD will display the {OK} and
{100%} icons, indicating the data is copied. You may remove
the memory card and turn OFF the device by pressing (for 3
seconds) the [POWER] button unit the LCD is turned OFF .
§ During copy, the content of the memory card is copied to the hard disk. The [CARD] and
[HDD] LEDs will blink indicating that both Memory Card and Hard Disk Drive is being
accessed and copy is in progress. A default directory [FILE] is created in the hard disk Root
Directory and the respective sub-folder for various type of Memory Cards will be created in the
format as follows :
Compact Flash (CF) : starting [CF000001]
Secured Digital (SD) : starting [SD000001]
Multimedia Memory (MMC) : starting [MC000001]
Memory Stick (MS) : starting [MS000001]
User Manual
8


