


SERVICE MANUAL
14 30APR96 – SM4530-1
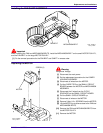
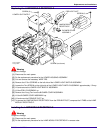
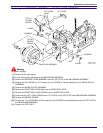
Installing the MECHANISM ASSEMBLY
Important
To insert the SELECT BUTTON into the hole in the SELECT LEVER when installing the MECHANISM ASSEMBLY,
hold the SELECT BUTTON completely down.
[1] Do the removal procedure for the MECHANISM ASSEMBLY in reverse order.
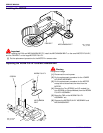
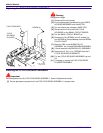
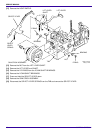
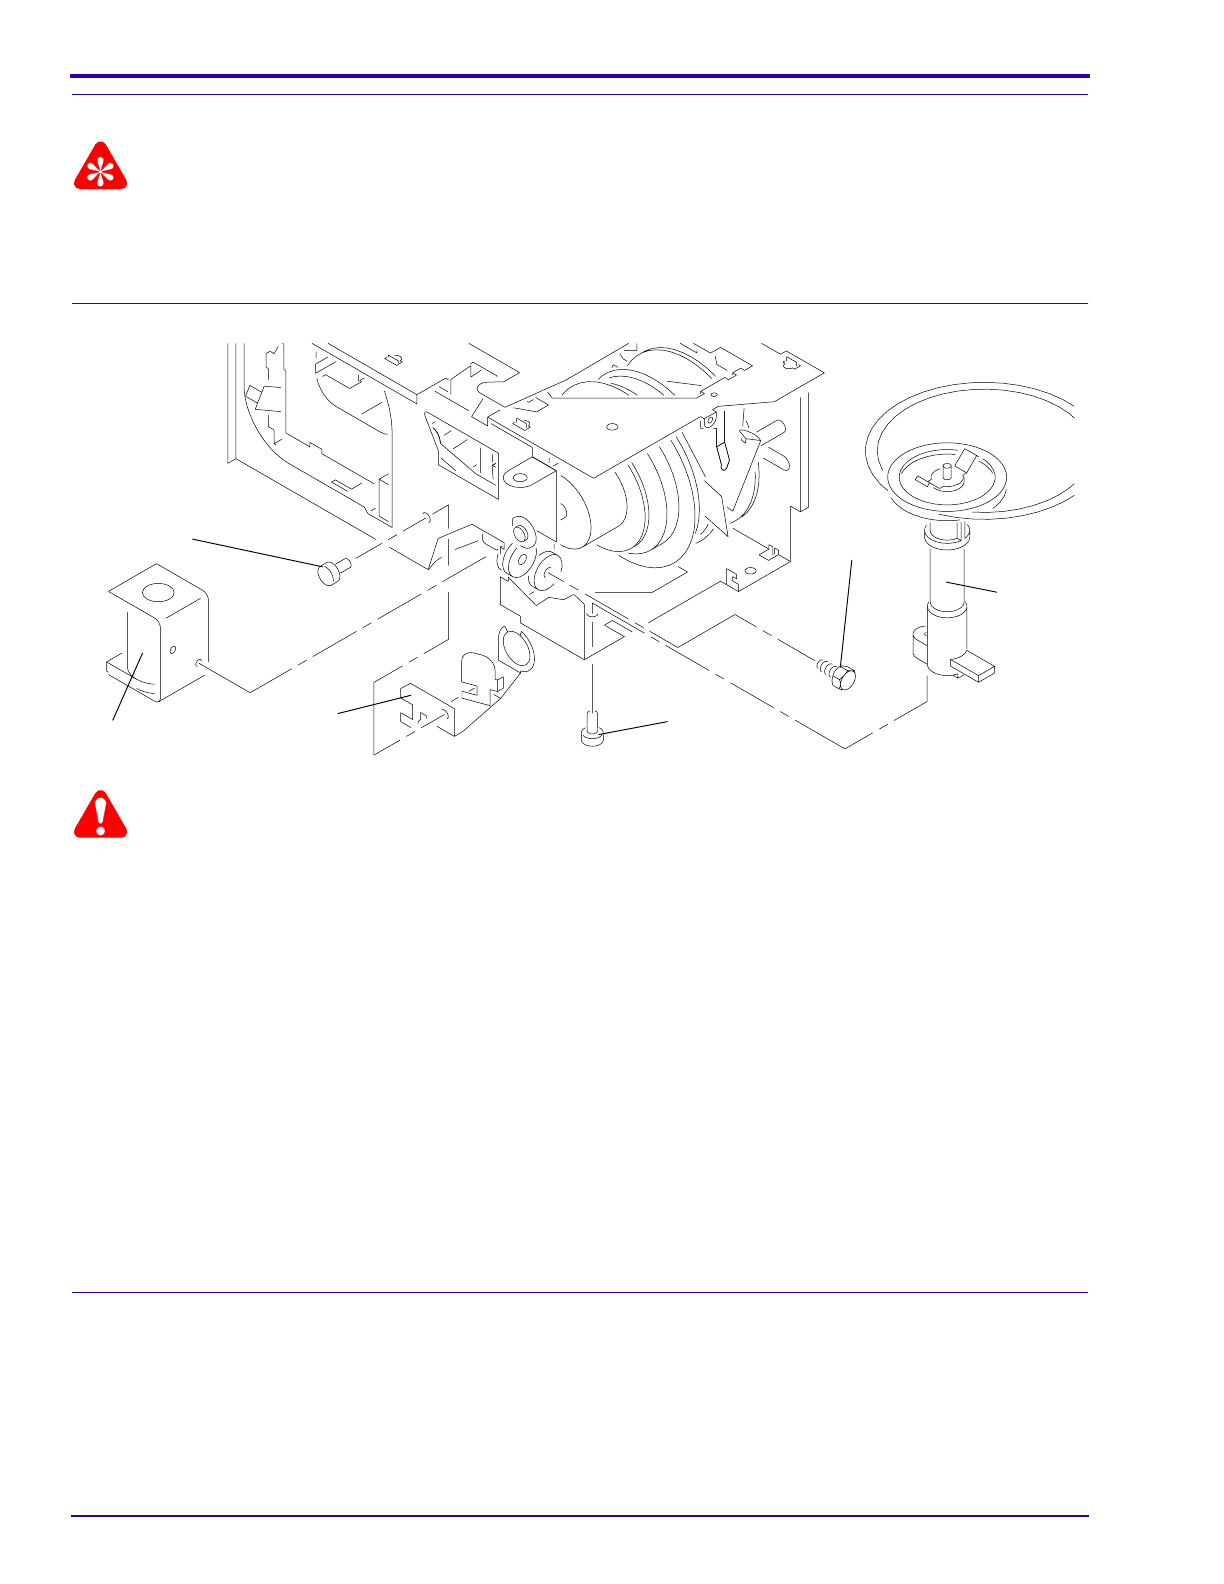
Replacing the AUTO-FOCUS BRACKET ASSEMBLY
Warning
Dangerous Voltage
[1] Disconnect the main power.
[2] Do the replacement procedure for the LOWER HOUSING ASSEMBLY.
[3] Cut and remove the necessary WIRE TIES.
[4] Disconnect the 2 wires from the CYCLE SOLENOID on the SMALL CIRCUIT BOARD.
[5] Pull the SMALL CIRCUIT BOARD up.
[6] Do the replacement procedure for the MECHANISM ASSEMBLY.
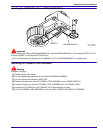
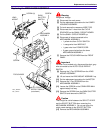
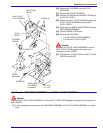
[7] Remove the
Torx
SCREW (on N.P. models) (or Hex SCREW on Painted Models) from the WORM PULLEY.
[8] Remove the WORM PULLEY.
[9] Remove the 2
Hex
SCREWS from the CYCLE SOLENOID.
[10] Remove the CYCLE SOLENOID.
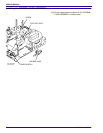
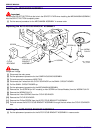
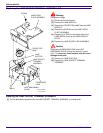
[11] Remove the
Phillips
SCREW from the AUTO-FOCUS BRACKET ASSEMBLY.
[12] Pull and remove the AUTO-FOCUS BRACKET ASSEMBLY through the hole where the CYCLE SOLENOID
was.
Installing the AUTO-FOCUS BRACKET ASSEMBLY
[1] Do the replacement procedure for the AUTO-FOCUS BRACKET ASSEMBLY in reverse order.
A091_4023BA
SOLENOID
CYCLE
SCREW
ASSEMBLY
BRACKET
FOCUS
AUTO
SCREW (2)
SCREW
A091_4023BCA
PULLEY
WORM