


7
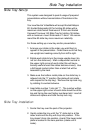
Installation
Installation
Before installing please review precautions.
For those users familiar with both the operation of 35mm
slide projector and their own video displays, the following
is an abbreviated start-up procedure.
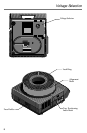
1. Check the voltage setting before powering on. Make
sure that the setting is correct. In addition, the fuse
needs to be checked.
2. Plug in power cable.
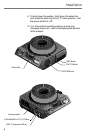
3. Connect peripheral equipment to the BNC and/or S-
Video Connector located under the lamp module.
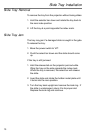
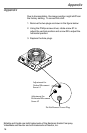
4. Make sure there is no slide left in the slide gate.
Place slide tray on the projector with the “0” slide slot
at the gate index.
5. Turn on peripherals and set the VideoMate power
switch to high. If white light from the projector spills
onto the monitor screen when the projector is first
turned on, the automatic dark-screen shutter built into
the projector is not engaged. To engage the shutter,
simply press the select bar. The shutter will engage
and the projector light will be blocked.
6. Select a relatively “white” slide to represent the highest
signal level the electronic must accommodate. Adjust
the Iris Control “I” and the peripheral controls to
produce a suitable image. The Focus control “F”
should also be adjusted at this time. Turn Zoom wheel
to achieve desired magnification.
NOTE: A very dark slide may require readjustment of
the Iris Control, but normally, a setting can be reached
that produces an acceptable display throughout the
range of slides.
The more the iris is open, the less the depth of field.
What this means is that with the darker slides, you will
open the iris more and will be able to judge focus more
critically; but also means that any deformities in the slide
will cause a visible “out-of-focus” condition.