


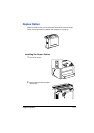


Hard Disk
139
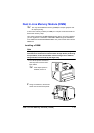
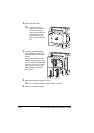
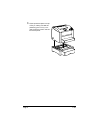
3 Remove the rear panel.
" Since there are two
hooks on the right side of
the panel, remove the
rear panel by slightly pull
-
ing the left side of the
panel toward you, then
sliding the panel off to the
left.
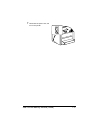
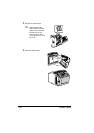
4 Attach the mounting pin on the
printer controller board.
" Be sure to slide the tab
on the hard disk mount-
ing pin to the left during
installation.
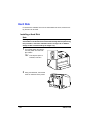
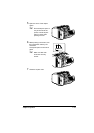
5 Attach the spacer to the hard
disk controller board.