


Contents
i
Contents
1
Introduction 1
1.1
About the VP-727T Presentation Switcher Control Panel 1
2
Getting Started 1
2.1
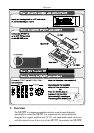
Quick Start 1
3
Overview 2
4
Your VP-727T Presentation Switcher Control Panel 3
5
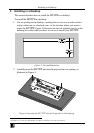
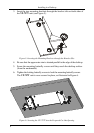
Installing in a Desktop 7
6
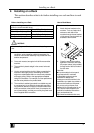
Installing on a Rack 9
7
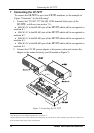
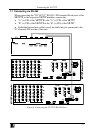
Connecting the VP-727T 10
7.1
Connecting via RS-485 11
7.2
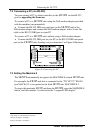
Connecting a PC (via RS-232) 12
7.3
Setting the Machine # 12
8
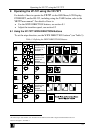
Operating the VP-727 using the VP-727T 13
8.1
Using the VP-727T WIPE DIRECTION Buttons 13
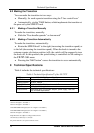
8.2
Making the Transition 14
8.2.1
Making a Transition Manually 14
8.2.2
Making a Transition Automatically 14
9
Technical Specifications 14
Figures
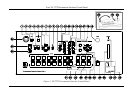
Figure 1: VP-727T Presentation Switcher Control Panel 4
Figure 2: VP-727T Presentation Switcher Control Panel (Side Panel) 6
Figure 3: Cut Out Dimensions 7
Figure 4: Inserting the VP-727T into the Prepared Cut Out Opening 7
Figure 5: Inserting the Mounting Brackets through the Bracket Slits 8
Figure 6: Securing the VP-727T into the Prepared Cut Out Opening 8
Figure 7: Connecting the VP-727T 10
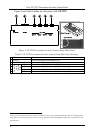
Figure 8: Connecting the VP-727T RS-485 Ports 11
Figure 9: Connecting the PC 12
Tables
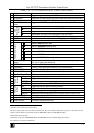
Table 1: VP-727T Presentation Switcher Control Panel Features 5
Table 2: VP-727T Presentation Switcher Control Panel (Side Panel) Features 6
Table 3: Defining the WIPE DIRECTIONS Buttons 13
Table 4: Technical Specifications of the VP-727T 14