3
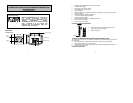
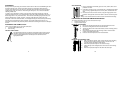
TO INSTALL AND REPLACE BATTERIES IN THE TEMPERATURE SENSOR
The sensor uses 2 x AA,1.5V batteries. To install and replace the batteries, please follow the
steps below:
1. Remove the cover.
2. Insert the batteries, observing the correct polarity (see marking inside battery compartment).
3. Replace the battery cover on the unit.
Alkaline batteries are recommended for use in both units. Avoid using rechargeable
batteries.
SETTING UP:
Alkaline batteries are recommended for use in both units. Avoid using
rechargeable batteries.
NOTE: Do not set the clock until the outdoor temperature is displayed.
1. Place batteries in the outdoor sensor first, then into the atomic clock. DO NOT PRESS
ANY BUTTONS FOR 10 MINUTES.
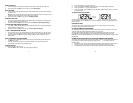
2. Once the batteries are in place, all segments of the LCD will light up briefly. Following the
indoor temperature, date, weekday, and the time as 12:00 will be displayed. If they are not
shown in LCD after 60 seconds, remove the batteries and wait for at least 60 seconds
before reinserting them. Once the indoor data is displayed user may proceed to the next
step.
3. After the batteries are inserted, the atomic clock will start receiving data signal from the
sensor. The outdoor temperature should then be displayed on the atomic clock. If this does
not happen after 2 minutes, the batteries will need to be removed from both units and reset
from step 1 and the signal reception icon is no longer shown.
Note:
In the event of changing batteries of the unit ensure that the batteries do not spring free from the
contacts. Always wait at least 10 minutes after removing the batteries before reinserting,
otherwise start up and transmission problems may occur.
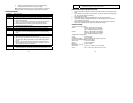
FUNCTION KEYS
The atomic clock has four easy to use keys:
SET key : To enter into the set mode for the following functions: time zone, DST ON/OFF
(daylight saving time), language, hour, minute, year, month, day, weekday,
12/24 hour, ºC or ºF temperature display
4
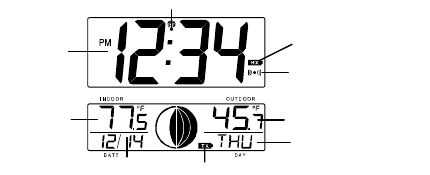
Weekday
Indoor temperature
+ key : To toggle between the second, temperature or weekday display
To change any values in manual set mode
ALM key : To enter into the alarm set mode
To display the alarm time in normal mode display
To set the alarm ON/OFF
SNZ key : To activate the snooze function during alarm
To exit the setting modes
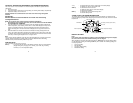
ATOMIC CLOCK LCD SCREEN DESCRIPTIONS
The atomic clock's LCD is divided into 2 sections and once the batteries are inserted, all the
segments will light up briefly before displaying the information for time, date, indoor and outdoor
temperatures.
MANUAL SETTINGS
Note:
If the atomic clock has already successfully received the WWVB time signal and displays
the correct time and date, then the Manual settings can be skipped.
After completion of the above described procedures in “Setting up” the manual setting modes
can be entered by pressing and holding the SET key for 3 seconds. The following settings can
now be programmed:
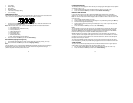
• Time zone setting
• DST ON/OFF
• Language display setting
• Manual time setting
Date
Outdoor temperature display
WWVB time
Radio rece
p
tion icon
Alarm icon
Low battery indicator (atomic clock)
Low battery indicator (sensor)


