


7
MONTH SETTING
1. The month digits on LCD2 will start flashing. Set the desired month by use of the + key.
2. Press and release the SET key to move to the mode “Date Setting”.
DATE SETTING
1. The digits for the date will start flashing on LCD2 (Default setting 1). Set the desired date by
use of the + key.
Note: The date can only be set in conjunction with the selected month. For example, it is not
possible to set the date 30 if the month of February is selected.
2. Press and release the SET key to enter the “Weekday Setting”.
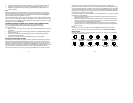
WEEKDAY SETTING
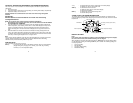
1. The weekday symbols will be displayed on LCD2 in the pre-set language and flashing. Set
the desired weekday by use of the + key.
2. Press and release the SET key to enter the mode “12/24 Hours Time Display Setting”.
12/24 HOURS TIME DISPLAY SETTING
1. The “12h” or “24h” will start flashing in LCD1 (Default setting 12h). Select the desired time
display mode by use of the + key.
2. Press and release the SET key to enter the “ºC/ºF Temperature Setting“.
°C OR °F TEMPERATURE SETTING
1. The characters “°C” or “°F” will start flashing on LCD1 (Default setting °F). By use of the +
key select “°C” for temperature display in degrees Celsius or “°F” for degrees Fahrenheit.
2. Press and release the SET key to exit the setting mode and switch back to the normal
display mode.
EXIT THE MANUAL SETTING MODES
• To return to the normal display mode from anywhere in manual setting mode simply press
the SNZ key anytime.
• If no keys are pressed for at least 15 seconds in setting mode, the atomic clock will
automatically switch back to normal display mode.
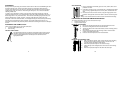
ALARM SETTING
To enter into the alarm setting mode:
1. Hold the ALM key for 4 seconds. The hour digits start flashing.
8
2. Press and release the + key to set the hour.
3. Press and release the ALM key to set the minutes. The minute digits start flashing.
4. Press and release the + key to set the minutes.
5. Press and release again the ALM key to exit the Alarm setting mode or wait for 15 seconds
automatic timeout.
TO DEACTIVATE THE ALARM:
The alarm will be automatically ON when the alarm time is set. To deactivate the alarm (OFF),
press and release once the ALM key in normal mode display. The alarm icon will disappear, the
alarm is now off.
SNOOZE SETTING
The snooze can only be activated during alarm time for a snooze duration of 10 minutes by
pressing the SNZ key on the back of the clock
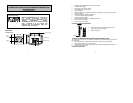
OUTDOOR TEMPERATURE SENSOR:
The temperature is measured and transmitted to the atomic clock every 4 seconds. The atomic
clock will update the outdoor temperature display every 4 seconds.
The range of the outdoor temperature sensor may be affected by the temperature. At cold
temperatures the transmitting distance may be decreased. Please bear this in mind when
positioning the sensor. Also the batteries may be reduced in power during periods of extreme cold
temperatures.
915MHz RECEPTION CHECK FOR OUTDOOR TEMPERATURE SENSOR
The atomic clock will receive the temperature data within 3 minutes. If the temperature data is not
being received 3 minutes after setting up (the display shows “- - -”), then please check the
following points:
1. The distance of the atomic clock or outdoor temperature sensor should be at least 6 feet (2
meters) away from any interfering sources such as computer monitors or TV sets.
2. Avoid placing the receiver onto or in the immediate proximity of metal window frames.
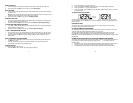
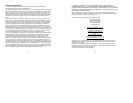
Alarm icon
(((•))) (ON)