


12
c. To disable the alarm for 24 hours press and release any button other
than the “SNOOZE” bar or projection keys.
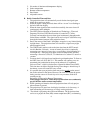
H. Changing the Display Mode (Day, Seconds and Temperature)
There are six possible display modes to view the day, seconds and temperature
(remote temperature is constantly displayed). To change the display (starting at
the default of day, month, date, remote temperature):
1. Press and release the “MODE/+” button. The display will now show
month, day, year, remote temperature
2. Press and release the “MODE/+” button again and the display will now
show seconds, remote temperature
3. Press and release the “MODE/+” button again and the display will now
show alarm1 time/remote temperature
4. Press and release the “MODE/+” button again and the display will now
show alarm2 time, remote temperature
5. Press and release the “MODE/+” button again and the display will now
show indoor temperature, remote temperature
6. Press and release the “MODE/+” button again and the display will now
show day, month, date, remote temperature
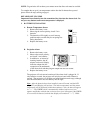
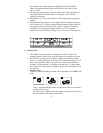
IV. Mounting the Remote Temperature Sensor
The remote temperature sensor can be mounted in two ways:
1) with the use of screws
2) using the adhesive tape
A. Mounting with Screws
1. Remove the mounting bracket from the remote temperature sensor. The
bracket should snap off easily.
2. Place the mounting bracket over the desired location.
3. Through the three screw holes of the bracket mark the mounting surface
with a pencil.
4. Where marked, start the screw holes into the mounting surface.
5.
Screw mounting bracket onto the mounting surface. Ensure that the screws
are flush with the bracket.
6. Snap the remote temperature sensor onto the mounted bracket.
B. Mounting with Adhesive Tape
1. With a nonabrasive solution, clean and dry the back of the mounting bracket
and the mounting surface to ensure a secure hold. The mounting surface
should be smooth and flat.
2. Remove the protective strip from one side of the tape.