LaCie Quick Install Guide 5
3.2. Fitting Modules
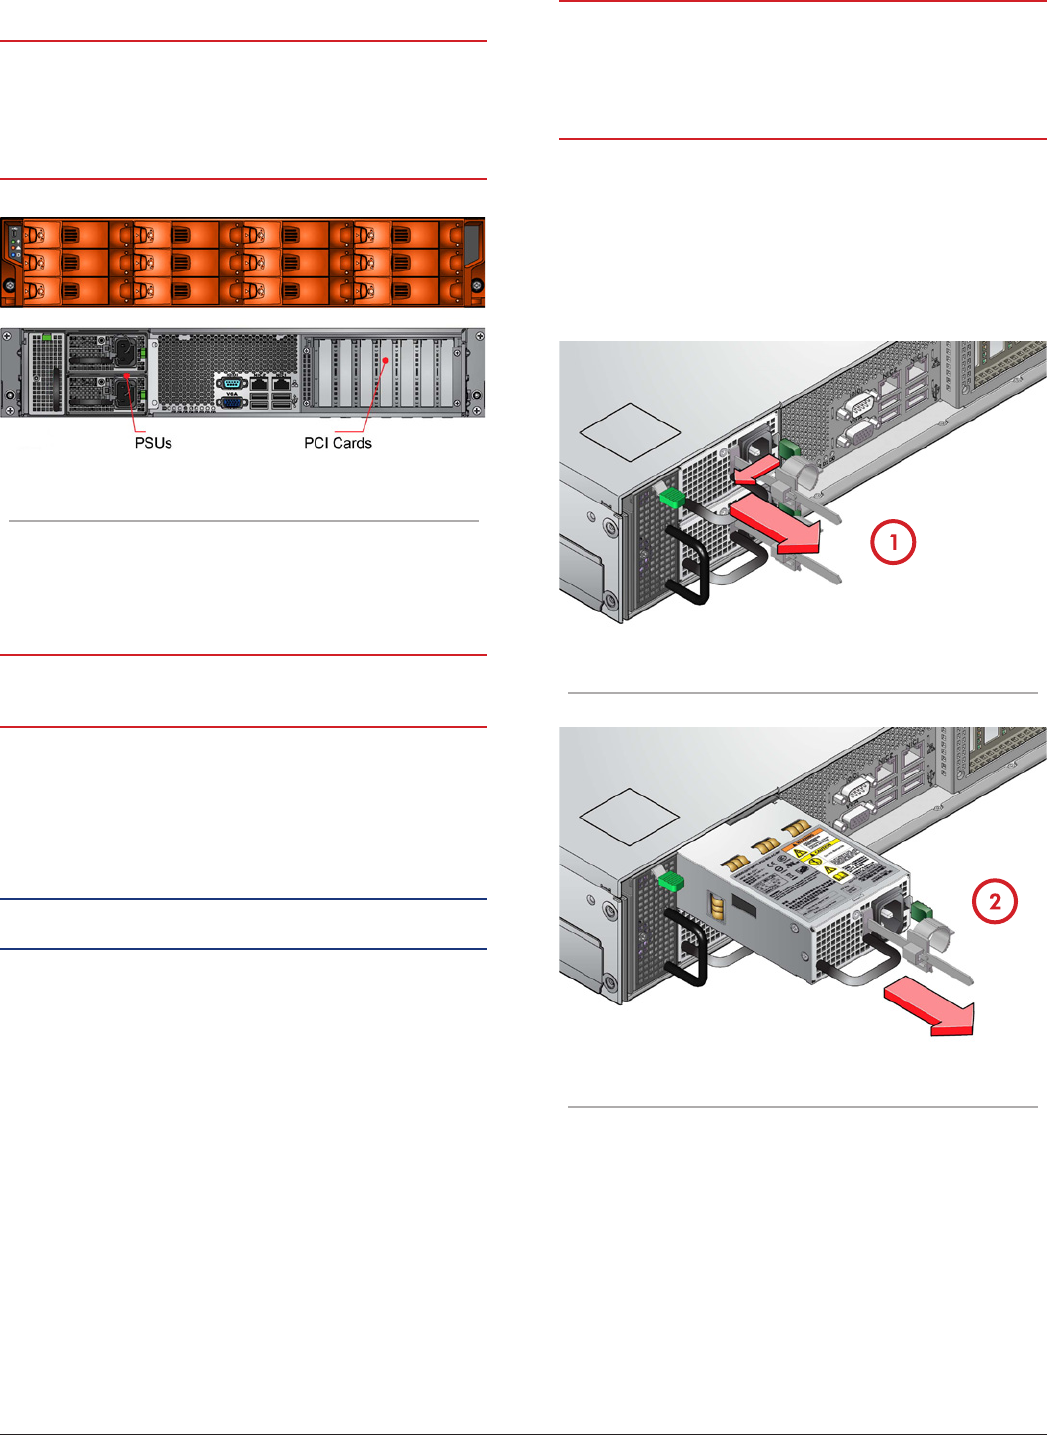
Fit the modules into the bays defined in Figure 3.
IMPORTANT INFO: The removal of the enclosure top cover or a PSU
module must only be performed by service personnel. Potential hazards
include rotating fans and hot surfaces. The screws or latches securing the
enclosure top cover and PSU modules must be firmly tightened to prevent
unauthorized access to those areas.
Figure 3: Module Locations
3.3. Fitting PSUs
Two PSUs are installed in the mounting cage at the rear of the enclosure.
IMPORTANT INFO: Do not remove covers from the PSU. Danger of
electric shock inside. Return the PSU to LaCie for repair.
1. Check for damage, especially to the rear connector on the PSU.
2. Handle the PSU carefully and avoid damaging the connector pins.
Do not install the PSU if any pins appear to be bent.
3. Slide the PSU into the mounting cage.
4. Push firmly until a click is heard as the securing spring engages.
NOTE: This module must only be removed by service personnel.
5. You are now ready to connect the power supply cords to the power
sources and switch the power supply ON.
3.4. Removing PSUs
IMPORTANT INFO: Prior to removing the PSU from the mounting cage,
please disconnect the power from the power supply, by either the switch
(where present) or by physically removing the power source, to ensure your
system has warning of an imminent power shutdown. Do not remove the
faulty PSU unless you have a replacement ready for insertion.
You can continue working while replacing the faulty PSU.
1. Make sure you identify the faulty PSU correctly from the two installed.
2. Switch off and disconnect the power supply cord.
3. Squeeze retaining handle to the left to release (see Figure 4a).
4. Grip the handle and withdraw the PSU (Figure 4b).
Figure 4a: Removing a PSU
Figure 4b: Removing a PSU


